There’s something deeply satisfying about stepping out your back door, basket in hand, and gathering eggs still warm from the nest. For many of us, raising backyard chickens is more than a practical choice—it’s a return to something slower, simpler, and more connected.
If you’ve been dreaming of keeping chickens but aren’t sure where to start, you’re in the right place. This guide walks you through every step of the journey—from legal considerations and choosing breeds to coop building, feeding, daily care, and troubleshooting common problems.
Whether you’re working with a suburban backyard or a few acres of pasture, raising chickens is a manageable and rewarding way to begin your homesteading journey.
Table of Contents
Why Raise Backyard Chickens & Is It Legal?
There’s something grounding about hearing a soft cluck in the morning or watching your flock scratch through fallen leaves for bugs. For many beginners, backyard chickens aren’t just about the eggs—they’re a gateway to a slower, more intentional way of life. Whether you’re on a quarter-acre lot in the suburbs or managing a full-fledged homestead, raising chickens can bring joy, food security, and a daily connection to nature.
But before you bring home a chirping box of baby chicks, there are a few things you need to know—starting with why chickens might be the best (and most manageable) first step toward self-sufficiency, and whether you’re actually allowed to keep them where you live.
Why Do People Raise Backyard Chickens?
1. Fresh, Nutritious Eggs
Let’s start with the obvious: the eggs. Fresh eggs from your own hens often have deeper orange yolks, firmer whites, and noticeably richer flavor. That’s because the hens have access to more varied diets, sunshine, and movement. Beyond taste, pasture-raised eggs can contain more omega-3s and vitamins A and E than store-bought options.

2. A Step Toward Food Independence
Raising your own food—even just a dozen eggs a week—is a powerful shift. Chickens are one of the easiest animals to care for, making them perfect for beginners interested in growing their own food or starting a backyard homestead. You’ll know exactly what your chickens are eating and how they’re treated.
3. Natural Pest Control
Chickens are insect hunters. They’ll reduce tick populations, devour beetles, scratch up grubs, and even take on the occasional small snake or mouse. If you’ve struggled with garden pests or bugs in the yard, a small flock can make a noticeable difference.
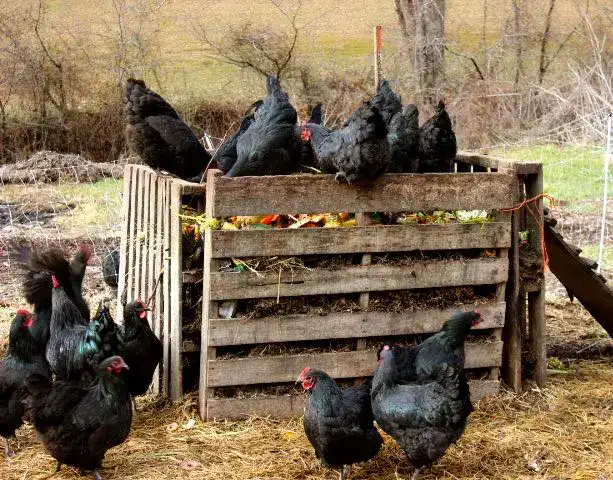
4. Free Fertilizer
Chicken manure is high in nitrogen, making it an excellent addition to compost. When properly aged or composted, it turns into rich, organic material that feeds your soil and improves your garden yield. Just be sure never to use it fresh—it’s too “hot” and can burn plants.
5. They’re Surprisingly Fun
Chickens have personalities. One might hop into your lap. Another might follow you around like a shadow. Some are chatty; others are aloof. Watching their behavior is oddly soothing, and most chicken keepers find themselves far more attached than expected.
If you have kids, chickens offer a unique way to teach responsibility, biology, and empathy. It’s hands-on learning with real-life stakes (and snacks).
Is It Legal to Raise Backyard Chickens in Your Area?
Before you buy a coop or fall in love with a breed, take a moment to confirm you’re actually allowed to keep chickens where you live. You don’t want to be the person who pours time and money into a flock only to face a zoning complaint.
Step 1: Check City or County Ordinances
Many urban and suburban areas allow backyard chickens, but with specific rules. These can vary drastically—even from one neighborhood to the next.
Common regulations include:
- Number of hens allowed (typically 3–6)
- No roosters due to crowing
- Minimum distance between your coop and neighboring structures
- Permits or licenses required before building a coop
- Restrictions on coop size or height
You can usually find this information on your city or county’s municipal code website. Search for terms like “urban chickens,” “backyard poultry,” or “domestic fowl.”
Pro tip: If your area doesn’t have clear rules listed online, call the zoning or animal control office directly. Be polite—they’re often more helpful over the phone than through web searches.
Step 2: Talk to Your HOA (if you have one)
Even if your city allows chickens, homeowners’ associations (HOAs) can set stricter rules. Some HOAs completely prohibit livestock. Others might allow hens but not visible coops or require written approval from neighbors.
If you’re in an HOA neighborhood, get clarification in writing before you invest. A simple email confirming the rules could save you a lot of heartache later.
Step 3: Talk to Your Neighbors
This isn’t required, but it’s good practice—especially in suburban settings where yards are close together. Letting your neighbors know you’re planning to get a few hens shows respect and transparency. Reassure them that:
- Hens aren’t loud like roosters.
- You’ll keep the coop clean and odor-free.
- Flies and pests can be managed with proper coop care.
Most people are more curious than concerned. We’ve even had neighbors offer to feed the hens while we’re away—in exchange for eggs, of course.
What Happens If You Skip This Step?
Unfortunately, there are plenty of stories about people being forced to rehome their chickens after complaints or citations. Don’t assume you’re safe just because other people in your area have chickens—zoning enforcement often happens only when a neighbor complains.
If your area doesn’t allow chickens now, consider organizing. Cities like Dallas, Chicago, and Tampa have updated their ordinances thanks to pressure from residents. Sometimes, a few polite conversations and a change.org petition can start the process.
Know Before You Cluck
Raising chickens isn’t just about eggs—it’s about stepping into a more rooted rhythm of life. But before you dive in, make sure you can do it legally and respectfully. Research your local ordinances, check HOA rules if applicable, and have a neighborly chat or two.
Once you’re clear on the “yes,” the real fun begins: choosing your breeds, building the coop, and preparing for your very first egg.
Choosing the Right Chicken Breed
Not all chickens are created equal. Some lay nearly an egg a day, while others take long, luxurious breaks. Some are quiet and sweet; others are opinionated escape artists with a lot to say. When you’re just getting started with backyard chickens, choosing the right breed—or mix of breeds—can make the difference between a fun, manageable experience and one that leaves you overwhelmed.
Let’s walk through what matters most when picking your first chickens and a few of the best beginner-friendly breeds to consider.
What Makes a Chicken “Beginner-Friendly”?
When we talk about good breeds for beginners, we’re looking for a few things:
- Reliable egg production
- Gentle temperament
- Hardiness in your climate
- Ease of care
- Adaptability to confinement or free-range living
You want birds that are forgiving. That means they won’t go broody every month, aren’t prone to health issues, and can handle some weather variation. Bonus points if they’re easy to catch and tolerate kids or dogs.
Egg-Laying vs. Dual-Purpose vs. Ornamental
Before choosing specific breeds, it helps to understand the three main categories of chickens you’ll find:
Egg-Laying Breeds
These hens are bred primarily for egg production. They start laying early (around 18 weeks) and often produce 5–6 eggs per week.
- Pros: Efficient, productive, usually smaller birds
- Cons: May stop laying sooner in life (around age 2–3)
Dual-Purpose Breeds
These birds are good layers and grow large enough to be used for meat. If you want eggs now and meat later, dual-purpose breeds are a solid choice.
- Pros: Long-term utility, hardy, generally docile
- Cons: Slightly lower egg output than production breeds
Ornamental Breeds
These chickens are bred for looks—think fluffy Silkies or fancy Polish hens with wild head feathers. They often have sweet temperaments but may not lay as well.
- Pros: Great for pets, 4-H, or families
- Cons: Poor layers, can require special care
Top Chicken Breeds for Beginners
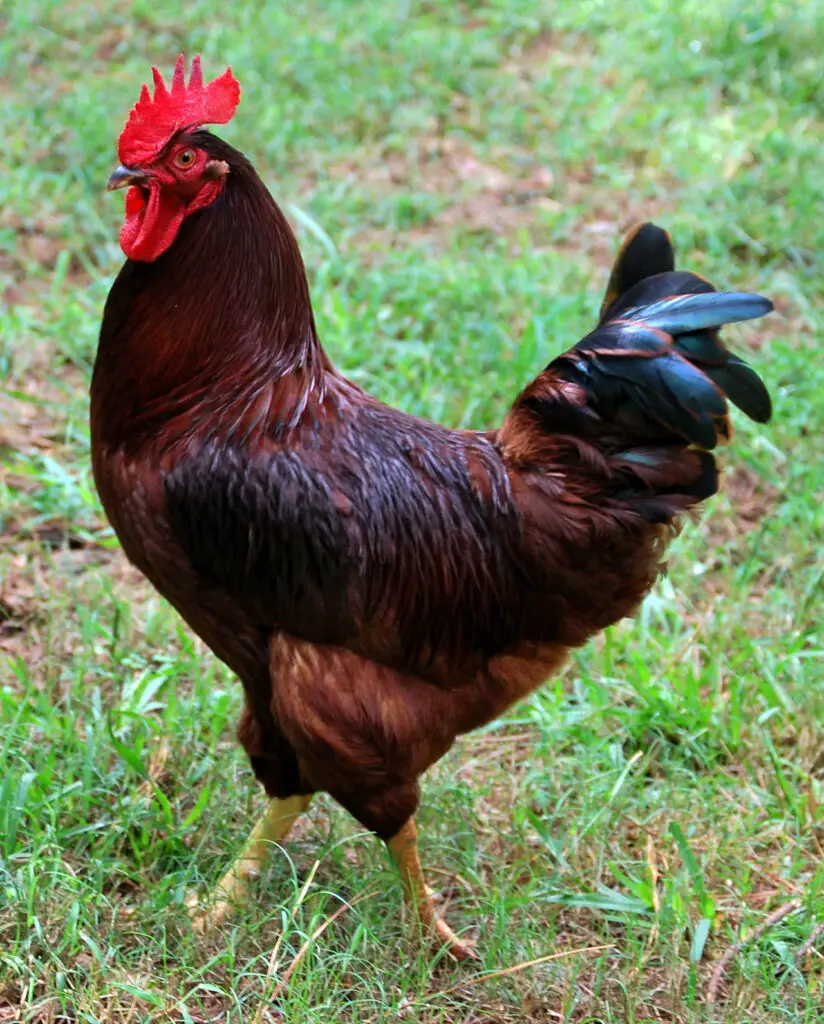
🐔 Rhode Island Red
Category: Dual-purpose
Eggs: 250–300 brown eggs/year
Temperament: Hardy, independent, sometimes assertive
These are the workhorses of the backyard flock world. They thrive in various climates, forage well, and don’t need much pampering. They can be a bit bossy with other hens, but they’re usually easy to manage.
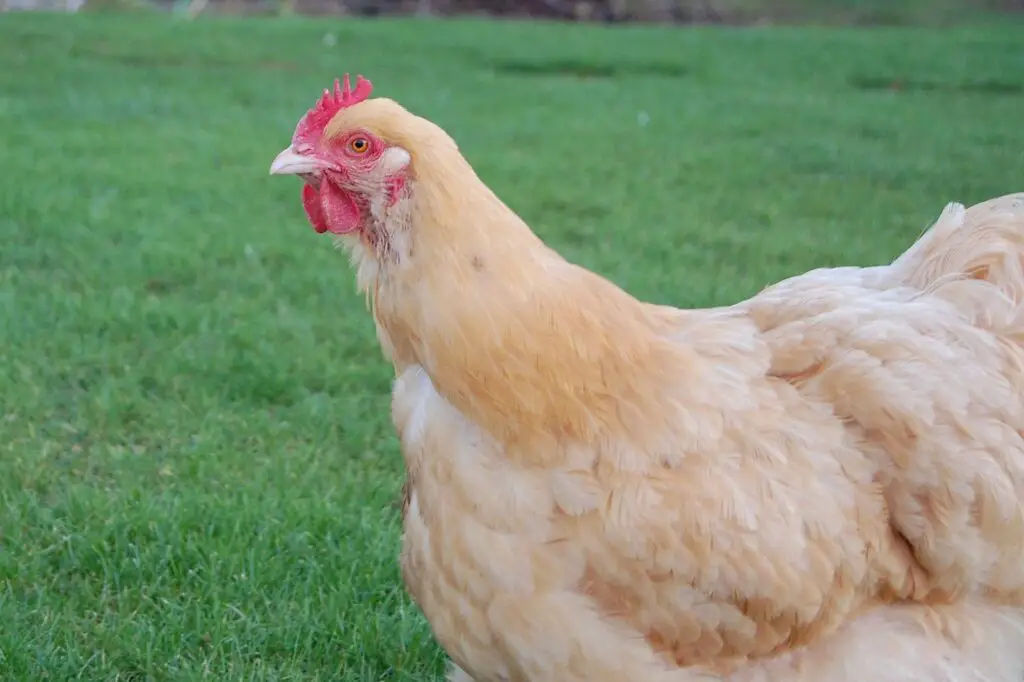
🐔 Buff Orpington
Category: Dual-purpose
Eggs: 200–280 brown eggs/year
Temperament: Gentle, friendly, great with kids
If you want a calm, pet-like chicken, Orpingtons are perfect. They’re fluffy and mellow, and many will follow you around the yard. Be aware that they can go broody occasionally, which means they stop laying to try and hatch eggs—even if they don’t have any.
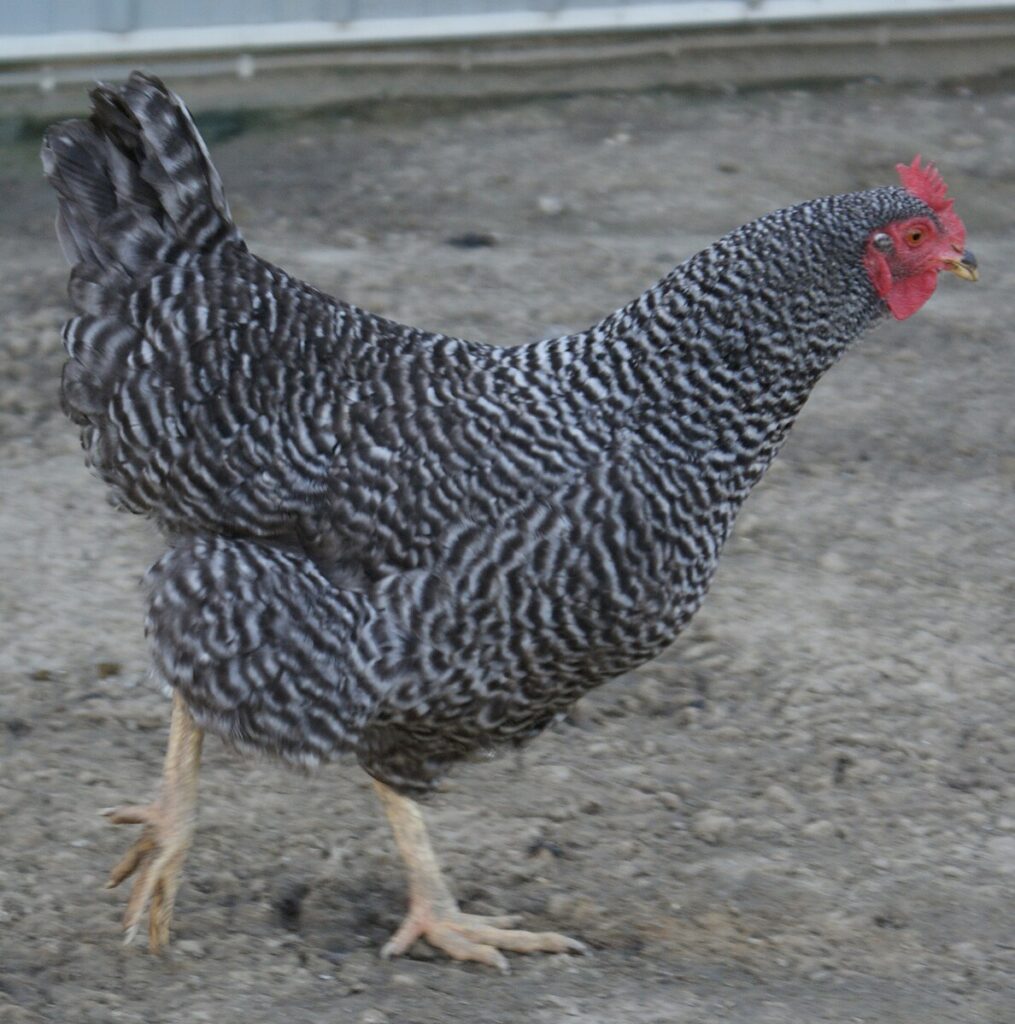
🐔 Barred Plymouth Roc
Category: Dual-purpose
Eggs: 200–280 brown eggs/year
Temperament: Curious, docile, cold-hardy
With their black-and-white stripes, Barred Rocks are easy to spot. They’re a great family bird—curious, calm, and not flighty. They adapt well to confinement and also love to free range.
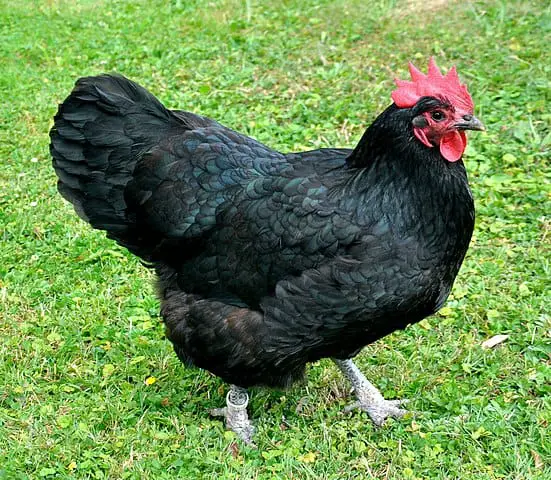
🐔 Australorp
Category: Egg-laying
Eggs: 250–300 brown eggs/year
Temperament: Quiet, sweet, gentle
Australorps are egg-laying champs and one of the most underrated beginner breeds. They’re quiet and easygoing, making them a great choice for urban backyards. Their glossy black feathers shimmer with green in the sun.
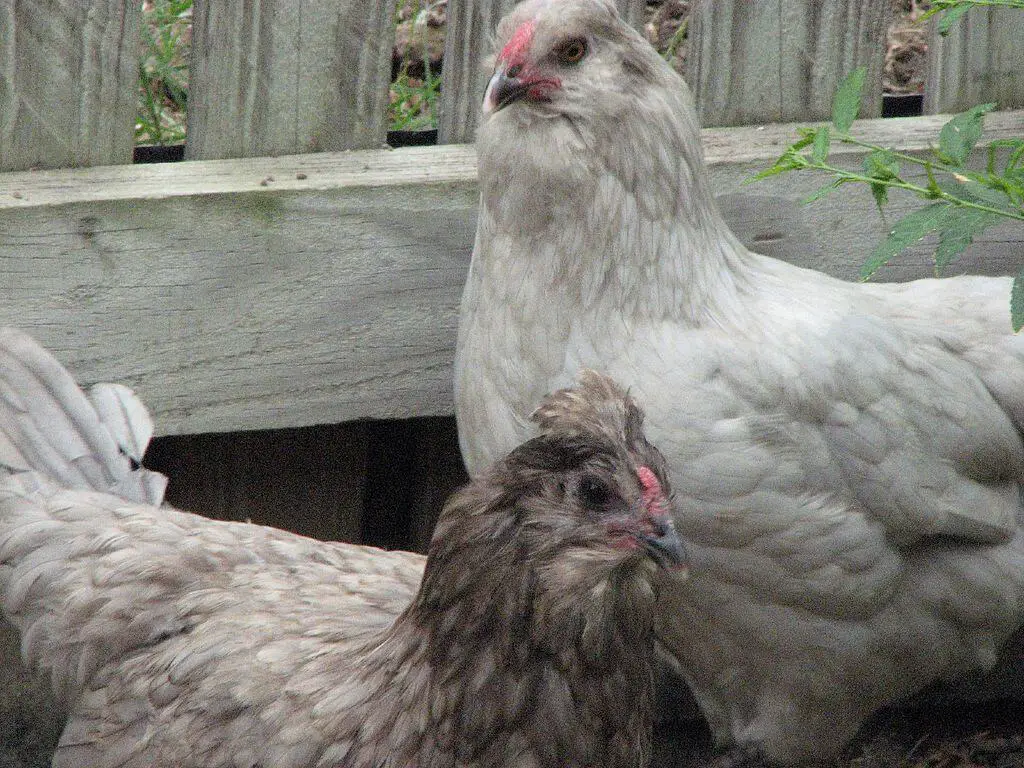
🐔 Easter Egger
Category: Egg-laying
Eggs: 200–280 blue, green, or pinkish eggs/year
Temperament: Friendly, varied personalities
These are not a true breed but a mix that carries the gene for colorful eggs. If you want a pretty egg basket, Easter Eggers are a must. Their appearances vary—some have beards and muffs, some don’t—and they tend to be cheerful, social birds.
Other Breeds to Consider
- Sussex: Curious and consistent layers, often overlooked
- Wyandotte: Striking feather patterns, cold-hardy, can be bossy
- Leghorn: Super layers, but flighty and not cuddly—better for experienced keepers
What About Bantams?
Bantams are miniature chickens—about 1/4 the size of standard breeds. They lay tiny eggs and are often ornamental or kept as pets. Some people love them, especially kids, but they aren’t the best choice if your main goal is eggs. They also fly better than standard chickens and can escape more easily.

Climate Consideration
- Cold climates: Choose breeds with small combs (like Wyandottes or Orpingtons) to reduce frostbite risk.
- Hot climates: Lighter breeds with large combs (like Leghorns or Andalusians) tolerate heat better.
If your area has temperature extremes, go for hardy, dual-purpose breeds that have been bred for survival—not just show.
Mixing Breeds: Yes or No?
Absolutely—mixing breeds is common in backyard flocks and actually helps you learn which ones you like best. Just be sure to choose birds with similar temperaments so nobody gets bullied. For example, pairing docile Orpingtons with hyperactive Leghorns might not go well.
Where to Buy Chickens
- Local feed stores: Often sell day-old chicks in spring
- Reputable hatcheries: Like Meyer Hatchery, Cackle Hatchery, or McMurray Hatchery
- Local breeders or farms: May have started pullets for sale
- Chicken swaps or poultry shows: Check local Facebook groups
Avoid buying from random sellers on Craigslist unless you’re confident in their care standards. Poor breeding can lead to health or temperament problems down the road. Also check out how much do chickens cost?
Start With the Birds You’ll Enjoy
If egg color makes you happy, get an Easter Egger. If you want a lap chicken, try an Orpington. If you just want a strong layer and don’t care about fluff, go with a Rhode Island Red. There’s no perfect breed for everyone—but there’s likely a perfect bird for you.
Start with 2–3 breeds that check your boxes. You’ll learn their quirks, personalities, and preferences over time—and you’ll be better prepared to add to your flock in the future.
How Many Chickens Should You Start With?
Once you’ve chosen a few breeds you’re excited about, the next big question is: how many chickens should you start with? It’s a deceptively simple decision that affects everything from coop size and feed costs to your daily chores and egg output.
While it might be tempting to go big right away, most new chicken keepers find that starting with a small, manageable flock is the best way to learn. Here’s how to figure out the right number for your backyard, your needs, and your sanity.
The Golden Rule: Chickens Are Flock Animals
Chickens are deeply social. They sleep together, forage together, preen together, and form clear hierarchies—sometimes called the “pecking order.” A single chicken will be anxious, noisy, and vulnerable to predators. Even two birds can lead to bullying if one is more dominant.
Start with at least 3 chickens. That’s the bare minimum for a functional, low-stress flock. Four to six is even better for egg production and social balance.
How Many Eggs Do You Want?
A big part of this decision comes down to eggs. Most backyard breeds lay 4–6 eggs per week during their peak laying years. Pullets (young hens under a year) often start laying at 18–22 weeks of age and will produce regularly for 2–3 years before production naturally tapers off.
Here’s a quick guide to how many hens you need based on your household egg use:
| Hens | Average Eggs/Week | Best For |
|---|---|---|
| 3 hens | 12–18 eggs | Single person or couple |
| 4 hens | 16–24 eggs | Family of 3–4 |
| 6 hens | 24–36 eggs | Family who cooks daily with eggs |
| 8–10 hens | 32–60 eggs | Extra for baking or sharing |

If you’re planning to sell or share eggs, you’ll want to start on the higher end—closer to 8–10 hens. But remember: more hens = more poop, more feed, more cleaning.
Planning for Space
Once you know how many chickens you want, you need to think in square footage. The general rule is:
- 4 square feet per chicken inside the coop
- 10 square feet per chicken in the outdoor run
So, for a small flock of 4 hens:
- Coop = 16 sq ft (e.g., 4×4)
- Run = 40 sq ft (e.g., 5×8)
If your birds will free-range during the day, you can get away with a slightly smaller run—but don’t skimp on the coop. Cramped living space leads to stress, fighting, egg-eating, and even feather picking.
Planning Tip: Always build a little bigger than you think you need. It’s easier to add birds later than to rebuild your setup.
Starting Small (But Not Too Small)
Some folks hear “start small” and think one or two chickens is enough. That’s a mistake.
Not only are solo chickens sad and loud, but very small flocks are also more vulnerable to:
- Predator losses (one hawk could wipe you out)
- Egg gaps (when a hen molts or gets broody)
- Social stress (bullies have no one else to pick on)
Start with 3 to 6 birds. That gives you enough eggs, some social cushion, and time to get the hang of chicken keeping without feeling overwhelmed.
If you love it, you can always scale up next year.
What About Local Laws?
Before finalizing your number, check your city or HOA rules. Many places allow backyard chickens but limit the number of hens you can keep. Common caps include:
- 3–4 hens in urban/suburban areas
- 6 hens in less dense neighborhoods
- No roosters allowed (more on that in Part 10)
Some towns allow more if you apply for a permit or complete a short inspection. Even if you don’t have an HOA, it’s worth being neighbor-aware—especially if you’re in close quarters.
Other Things to Consider
❓ Will You Be Around to Care for Them?
Chickens are relatively low-maintenance—but they still need:
- Fresh food and water daily
- Protection from predators
- Cleaning and monitoring
If you travel a lot or already feel stretched thin, fewer birds = less work.
❓ Will You Keep Them Long-Term?
Chickens don’t lay forever. After 2–3 years of strong egg production, most hens slow down significantly. They can live 6–10 years, depending on breed and care.
That means you’ll eventually need to decide whether to:
- Let older hens retire and keep them as pets
- Rehome them
- Process them for meat (if you’re open to that)
Planning for this ahead of time helps avoid flock size creeping up year after year.
❓ Will You Add More Later?
A lot of chicken keepers catch the “chicken math” bug. You start with four hens and suddenly you’re building a second coop and naming your 17th Easter Egger. Be realistic. If you know you’ll want more next year, build a slightly bigger coop now to save time and money later.
A Balanced Flock Is a Happy Flock
The ideal beginner flock isn’t just about numbers—it’s about balance. A mix of 4–6 hens from different breeds gives you:
- Egg variety (colors, sizes)
- Personality variety (some shy, some outgoing)
- A buffer if one or two stop laying seasonally
And maybe best of all? It’s just enough chickens to feel like you’ve started something meaningful—without letting it take over your life.
Building or Buying the Right Chicken Coop
Your chicken coop is more than just a house—it’s your flock’s sleeping quarters, protection from predators, egg-laying station, and storm shelter. A well-designed coop makes your life easier, your hens happier, and your mornings quieter (because trust me, they’ll complain if things aren’t right).
Whether you plan to build it yourself or buy a ready-made model, this guide covers what every beginner needs to know to set up a safe, functional, low-maintenance chicken coop.
Coop vs. Run vs. Tractor: What’s the Difference?
First, let’s define the three key components of a backyard chicken setup:
- Coop: The enclosed, weatherproof structure where chickens sleep, lay eggs, and roost at night.
- Run: The attached outdoor space where chickens scratch, dust bathe, and explore during the day. Usually fenced but not roofed.
- Tractor: A movable coop/run combo that can be dragged to fresh pasture daily. Great for small flocks and rotational grazing.
For most beginners in a fixed backyard setup, a stationary coop + secure run is the most manageable and predator-safe option.
How Much Space Do Chickens Need?
Use these basic guidelines for flock comfort and health:
- Inside the coop: 4 square feet per chicken
- In the run: 10 square feet per chicken
- Roosting bar: 8–12 inches of space per chicken
- Nesting boxes: 1 box per 3–4 hens
Example:
For 4 hens, your coop should be at least 16 sq ft (e.g., 4×4 feet), and the run should be 40 sq ft (e.g., 5×8 feet).
If your chickens will free-range during the day, you can reduce run size slightly—but never overcrowd the coop. Too little space leads to:
- Bullying and feather pecking
- Stress-related health issues
- Egg eating or sleeping in nesting boxes
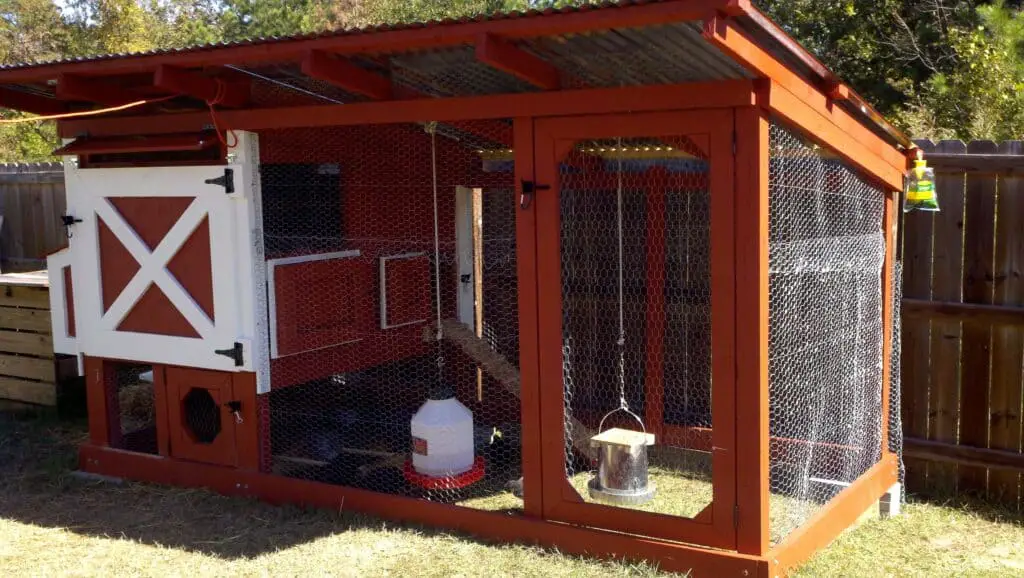
Coop Design Must-Haves
A good coop doesn’t have to be fancy, but it must include:
🪵 Roosting Bars
Chickens don’t sleep on the ground—they roost. Install rounded or flat wooden bars (not metal) 2–4 feet off the ground with enough space for all hens. Keep roosts higher than nesting boxes to discourage sleeping where they lay.
🪺 Nesting Boxes
Nest boxes should be 12″x12″x12″, lined with straw or pine shavings, and placed lower than your roosting bars. Hens prefer privacy, so add dividers or curtains if needed. Keep them clean to avoid poop-covered eggs.
💨 Ventilation
This is crucial. Chickens release a lot of moisture through their breath and droppings. Without good airflow, ammonia builds up—leading to respiratory illness and frostbite in winter.
Good ventilation = vents near the roofline + windows with hardware cloth.
🚪 Access Doors
You’ll need:
- A small chicken door they go in/out of (can be manual or automatic)
- A larger clean-out door or removable wall so you can rake out bedding easily
- Egg collection access, either via hinged nesting box lid or a side door
Materials: What to Use (and Avoid)
- Use: Treated lumber, plywood, exterior paint or stain, heavy roofing materials (metal, asphalt shingles)
- Avoid: Pallets with mystery stains, chicken wire for predator protection, anything that warps easily or retains moisture
Insulation is usually not necessary unless you live in extreme cold. A well-ventilated coop with deep bedding does more for your flock than wall insulation.
Predator-Proofing the Coop
This is where many beginner coops fall short. Everything loves to eat chickens, including:
- Raccoons
- Coyotes
- Hawks
- Neighborhood dogs
- Weasels
- Rats and snakes (for eggs)
Tips to make your coop predator-proof:
- Use hardware cloth (¼”), not chicken wire, for all vents and windows.
- Bury a hardware cloth apron 12 inches deep around the perimeter to prevent digging.
- Use two-step latches on all doors (raccoons can open simple ones).
- Lock your flock up each night—or install an automatic coop door.

Should You Build or Buy a Coop?
🔨 Build your own if:
- You want to customize the layout
- You enjoy building projects
- You need to save money
🛒 Buy one if:
- You’re short on time or tools
- You find a well-reviewed model suited to your climate
- You’re okay modifying it for durability and predator safety
Many prefab coops look cute online but are made with thin wood, poor latches, and undersized nesting boxes. They may advertise space for “6 hens” but realistically fit 2–3.
If you buy, plan to reinforce it:
- Add extra framing
- Upgrade mesh to hardware cloth
- Raise it off the ground
Coop Floor Options
- Wood floors: Easy to clean, retain warmth, but can rot if not sealed well.
- Concrete slab: Durable and predator-proof, but cold unless bedded deeply.
- Dirt floor: Natural, cheap, but easier for predators to dig into.
Flooring & Bedding: The Deep Litter Method
If you want low-maintenance cleaning, consider the deep litter method. Instead of removing droppings every week, you allow bedding (pine shavings, straw, leaves) to build up over months. The material composts in place, absorbs odor, and generates heat in winter.
Key points:
- Start with 4–6 inches of bedding
- Stir weekly with a rake or pitchfork
- Add fresh dry bedding every few days
- Remove and restart every 6–12 months
It’s great for cold climates and provides natural insulation and compost.
Coop Placement Tips
- Morning sun is ideal: helps dry bedding and gets hens moving early
- Shade in summer: place under a tree or add shade cloth
- Near your house: easier for egg collection, predator checks, and winter chores
- Avoid low areas where rain collects or wind tunnels that chill the birds
Build for Comfort, Safety, and Simplicit
A good coop doesn’t have to be fancy, but it should be:
- Spacious enough for your flock
- Easy for you to clean
- Safe from predators
- Well-ventilated and dry year-round
Investing time into a thoughtful coop setup on the front end means less stress—and fewer repairs—later on.
Feeding & Watering Chickens the Right Way
You don’t have to be a feed expert to raise healthy, productive hens—but giving your flock the right food and clean water consistently is one of the most important things you’ll do. Chickens will eat nearly anything, but not everything is good for them.
This section covers what to feed, how much, how often, and a few things that can go wrong if you’re not careful—plus seasonal water tips to keep your birds hydrated and thriving.
What Do Chickens Eat?
Chickens need a balanced diet of protein, calcium, and essential nutrients to lay well and stay healthy. Store-bought feed provides this, and everything else (like kitchen scraps or scratch grains) is supplemental.
Check out our master guide on what chickens can and can’t eat.
🥣 Types of Chicken Feed by Life Stage
| Age | Feed Type | Protein | Notes |
|---|---|---|---|
| 0–8 weeks | Starter feed | ~20–22% | Crumbles preferred; unmedicated or medicated |
| 8–20 weeks | Grower feed | ~16–18% | No extra calcium yet |
| 20+ weeks (laying age) | Layer feed | ~16–18% | Includes calcium for strong shells |
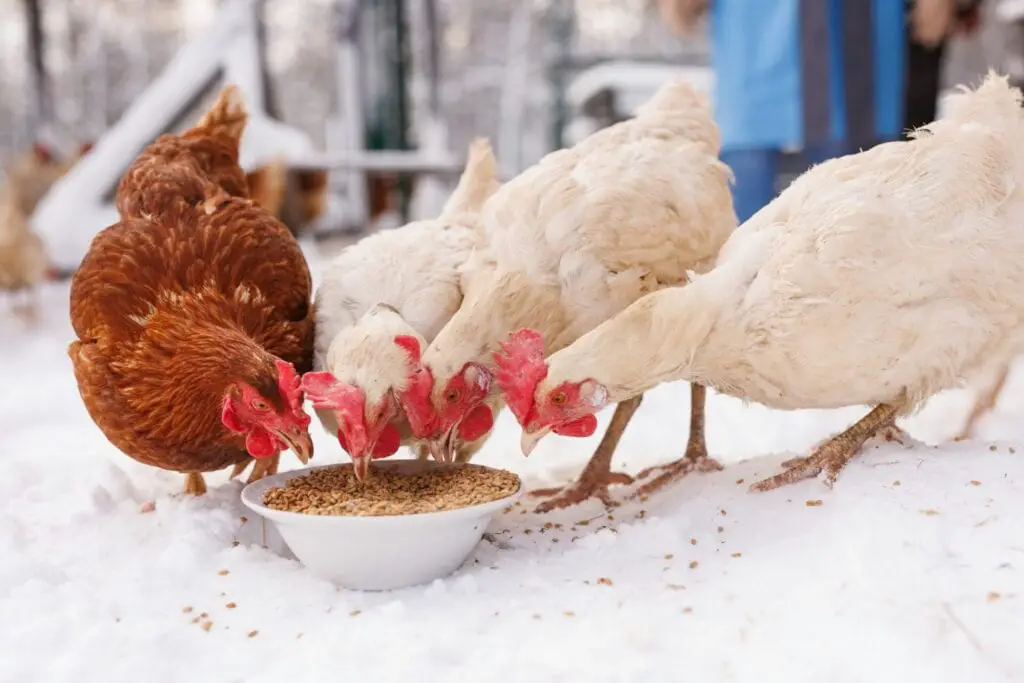
Pro tip: If you raise chicks and laying hens together, offer grower feed with calcium offered separately so both groups can eat safely. You can also make your own chicken feed.
Free Choice vs. Scheduled Feeding
Most backyard keepers use a free-choice system—fill the feeder, and let chickens eat as needed. Chickens naturally regulate their intake, especially when eating a balanced feed.
A laying hen eats about ¼ pound (1/2 cup) of feed per day. For a flock of 6 hens, plan on:
- 1.5 lbs/day
- ~10–12 lbs/week
- ~40–50 lbs/month
Feed costs vary by brand and region, but this means one 50 lb bag will last 4–5 weeks for a small flock.
Should You Feed Scraps?
Yes—but with care.
Kitchen scraps are a fun way to reduce food waste and give your birds variety. Just remember: scraps are treats, not a full diet. They should make up no more than 10% of total intake.
✅ Safe Chicken Scraps:
- Leafy greens (spinach, lettuce, kale)
- Cooked veggies (carrots, squash, peas)
- Fruits (apples, berries, melons)
- Cooked rice, oats, or pasta
- Bread (sparingly)
- Scrambled or crushed eggs (yes, it’s fine!)
🚫 Do Not Feed:
- Raw potato peels or green potatoes
- Onions and garlic (can taint egg flavor)
- Chocolate, caffeine, alcohol
- Avocado skin and pit
- Moldy food or spoiled leftovers

Do Chickens Need Grit and Calcium
Yes—especially if they’re not on commercial feed alone.
🪨 Grit (Insoluble)
Chickens don’t have teeth. Grit helps them break down seeds, grains, and fibrous materials in their gizzards. If they’re confined or eating lots of scraps or grains, offer free-choice grit made of crushed granite.
🐚 Calcium (Soluble)
Layer feed includes calcium, but offer free-choice crushed oyster shell or baked, crushed eggshells to laying hens. This prevents:
- Thin or brittle eggshells
- Egg binding
- Calcium depletion in hens
Do not give layer feed or extra calcium to non-laying birds like chicks or roosters—it can damage their kidneys.
Types of Feeders
The right feeder setup reduces waste, protects from rain, and limits access by wild birds and rodents.
Common Options:
- Hanging galvanized feeder: Simple and effective, but prone to tipping if not hung properly
- PVC pipe feeder: Great for dry climates, DIY-friendly
- Treadle feeder: Keeps feed dry and pest-free; birds step on the treadle to open it
Pro tip: Raise feeders to chicken chest height to reduce spilling and soiling.
How to Provide Clean, Fresh Water
Water is just as important as food—especially for laying hens. Dehydration can stop egg production, stress the birds, and cause heat exhaustion.
Chickens prefer:
- Cool water
- Clean water
- Access at all times
One hen drinks 1–2 cups of water per day, more in summer or when eating dry feed. Plan for 1–2 gallons per day for a 6-hen flock.
Waterer Options
🪣 Basic Waterer
- Gravity-fed (plastic or galvanized)
- Inexpensive and easy to clean
- Prone to tipping or freezing in winter
💧 Nipple or Cup Waterer
- More hygienic
- Great for warm climates
- Requires teaching chickens how to use them
❄️ Heated Waterer
- Prevents freezing in winter
- Essential for cold climates

Tip for hot weather:
Drop ice cubes into the waterer or freeze water bottles to float. Add electrolytes (available at feed stores) during heat waves to prevent heat stress.
Feeding Routine: What It Looks Like Day to Day
Morning
- Refill feeder if low
- Refresh water
- Toss a few treats (like veggie scraps) to distract while you clean
Afternoon
- Check water levels (especially in summer)
- Scatter a handful of scratch grains or sunflower seeds as a boredom buster
Evening
- Remove any soggy or spoiled food
- Refill if needed before nightfall
- Collect eggs to avoid attracting pests
What Can Go Wrong?
🚫 Feed Waste
- Chickens scratching feed out of the dish
- Wild birds or mice stealing from open feeders
- Rain getting into feed = mold risk
Solution: Use gravity or treadle feeders, and keep feed covered and off the ground.
🚫 Contaminated Water
- Algae growth in summer
- Poop or bedding in open dishes
- Freezing in winter
Solution: Clean waterers weekly, more often in heat. Use heated bases or insulated buckets in winter.
Keep It Simple, Keep It Clean
You don’t need complicated rations or fancy setups—just quality feed, fresh water, and a little consistency. Chickens are resourceful, but when you give them the right foundation, they reward you with vibrant health and dependable eggs. Make sure to adjust feeding schedules for colder weather.
Keep feeding systems clean, watch for changes in appetite or egg quality, and don’t be afraid to adjust your routine with the seasons.
Raising Baby Chicks vs. Buying Pullets
One of the first decisions you’ll face after planning your coop and choosing your breeds is this:
Do you want to raise chicks from scratch, or start with pullets already close to laying?
There’s no wrong answer—but the choice will shape your first few months of chicken keeping. Some people love the fuzzy cuteness and bonding that comes with baby chicks. Others would rather skip the brooder phase and jump straight into egg collection.
Let’s look at the pros, cons, and key considerations for both.
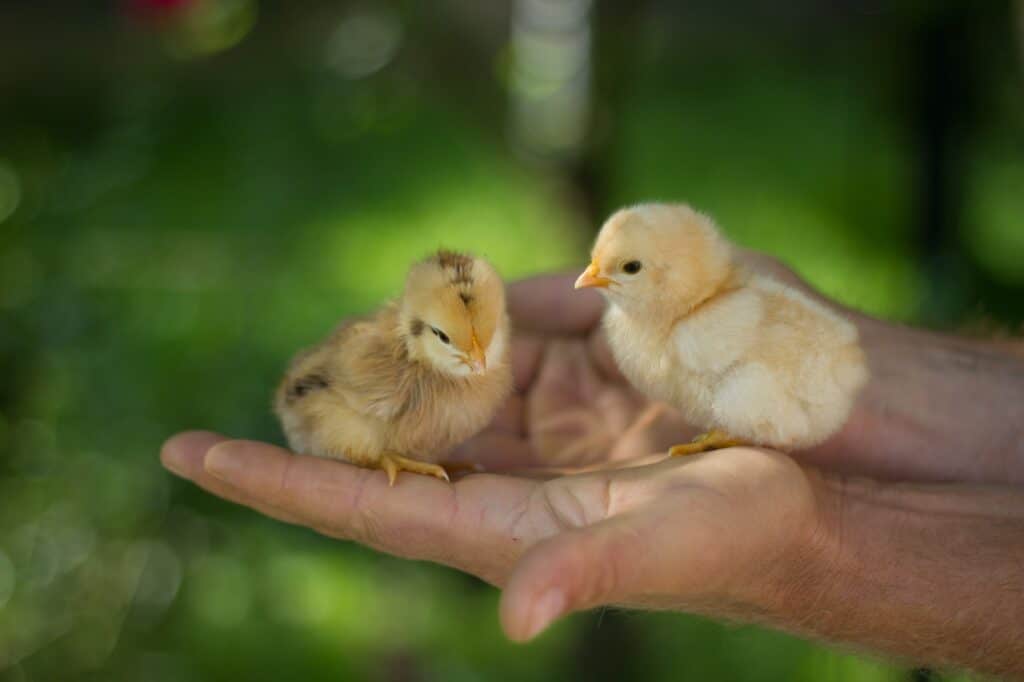
Option 1: Raising Baby Chicks
Bringing home a chirping box of day-old chicks is a joyful (and slightly nerve-wracking) experience. These tiny fluffballs weigh just a few ounces and need a lot of care in their first few weeks.
🐣 Pros of Starting with Chicks
- Cost-effective: Chicks are cheaper than pullets or hens
- Bonding: They grow up knowing your voice, scent, and presence
- More breed options: Hatcheries offer far more chicks than older birds
- Family-friendly: Great learning opportunity for kids
🐥 Cons of Starting with Chicks
- Needs special equipment (brooder, heat source, thermometer)
- Takes 5–6 months before eggs
- Higher risk of early mortality if conditions aren’t right
- Unsexed chicks may include roosters, unless you pay for sexed pullets
What You Need to Raise Chicks
🛠 Brooder Setup
Your brooder is a safe, enclosed space that keeps chicks warm, clean, and contained for the first 6–8 weeks.
You can use:
- A large plastic tote
- A cardboard appliance box
- A custom wood brooder
- A repurposed kiddie pool (with hardware cloth cover)
- A premade brooder

🌡 Heat Source
- Week 1: 95°F
- Drop 5°F per week until room temp (around 6 weeks old)
Use a heat plate brooder or heat lamp (carefully secured to avoid fire). Always give chicks space to move away from the heat if they’re too warm.
👀 How to Tell If Chicks Are Comfortable:
- Huddled under heat source = too cold
- Spreading out to edges, panting = too hot
- Evenly spaced, quiet, active = just right
🧼 Bedding
Use pine shavings, chopped straw, or hemp. Avoid cedar—it can irritate their lungs. Line the bottom with paper towels the first few days so they don’t slip or eat bedding by mistake.
🥣 Food & Water
- Use starter feed (20–22% protein)
- Shallow waterer with marbles or rocks to prevent drowning
- Raise both on bricks or boards to keep clean
✋ Handling & Socializing
Handle your chicks gently and often. Offer treats from your hand (crumbled boiled egg or tiny mealworms) once they’re a week old. This builds trust and makes future care easier.
When Can Chicks Move Outside?
Most chicks can move into the coop at 6–8 weeks, depending on weather and how well-feathered they are. They no longer need supplemental heat when:
- Night temps stay above 60°F
- They have full feather coverage (no patches of down)
- They’re active, alert, and well-adjusted to noise and movement
Transition them slowly—introduce them to the coop during the day for a few hours before moving them out permanently.
Option 2: Buying Started Pullets
If you’d rather skip the brooder, you can purchase started pullets—young hens between 12 and 20 weeks old. They’re often fully feathered and just a few weeks away from laying their first egg.
🐔 Pros of Buying Pullets
- No heat lamps, no brooder, no chick mess
- You’ll get eggs faster
- You can see temperament and body condition before buying
- You avoid the risk of surprise roosters
🐓 Cons of Buying Pullets
- More expensive upfront ($15–$30+ per bird vs. $3–$6 for chicks)
- Fewer breed choices locally
- May be less social if raised without much human interaction
- Must still integrate carefully if you have other birds
Where to Buy Pullets
- Local farms or hatcheries: Often sell extra birds in spring/summer
- Farm supply stores: May carry older birds later in the season
- Facebook or Craigslist: Use caution and check bird health before purchase
- Hatcheries: Some ship started pullets, though it’s costly
Always inspect birds before buying:
- Clear eyes and nostrils
- Smooth, full feathers
- No mites, crust, or swelling
- Alert and active demeanor
Integrating Pullets with an Existing Flock
If you’re adding pullets to a flock of older hens, do it carefully. Chickens have a rigid pecking order, and newcomers can be bullied if introduced too quickly.
Steps for safe integration:
- Quarantine new birds for 7–14 days to monitor health
- Place them in a separate pen within view of the main flock for a few days
- Introduce in neutral territory if possible (like the run)
- Watch for aggression—minor pecking is normal, but blood is not
- Add extra feeding/water stations to reduce resource guarding
Which Option Is Best for You?
Choose Chicks if:
- You want to raise them from the beginning
- You’re on a budget
- You have the time and space for a brooder
- You want a wider variety of breeds
Choose Pullets if:
- You want eggs sooner
- You’re short on time or space
- You’re nervous about heat lamps or brooder setup
- You want to avoid the rooster lottery
🥚 What About Incubating Eggs?
If you’re feeling adventurous (or have a broody hen on your hands), incubating fertilized eggs is another way to start or grow your flock. It requires a bit more attention to detail than raising hatchery chicks, but it can be incredibly rewarding to watch a chick emerge from an egg you’ve nurtured from day one.
🐣 How Incubation Works
To hatch your own chicks, you’ll need:
- Fertilized eggs: These come from a flock that includes a rooster. You can collect them from your own birds or buy from local farms or hatcheries.
- An incubator: Holds eggs at a stable temperature and humidity level.
- 21 days of patience: Chicken eggs typically hatch after 21 days.
🔧 Basic Incubator Setup
- Temperature: 99.5°F (for forced-air incubators); 101–102°F for still air
- Humidity: ~50–55% for days 1–18; increase to ~65–70% for final 3 days
- Turning: Eggs need to be turned 3–5 times a day (unless you have an automatic turner)
- Lockdown: On day 18, stop turning and boost humidity—this is “lockdown” before hatch

🐥 What to Expect
- Candling: You can shine a flashlight through the eggs at day 7 and 14 to see development
- Hatching: Chicks pip through the shell around day 20–21
- Don’t help them hatch unless absolutely necessary—chicks need time to emerge on their own
Once hatched, chicks stay in the incubator for up to 24 hours to dry and fluff. Then, they’re moved to the brooder just like hatchery chicks.
🤔 Is It Right for Beginners?
If you’re up for the learning curve and don’t mind the hands-on work, home incubation is very doable for beginners. It teaches patience, attention to detail, and gives you a stronger connection to your flock. But it also comes with heartbreak—not all eggs will hatch, and not all chicks will thrive.
Expect a success rate of 50–80%, even with a good incubator.
🐓 Bonus Tip: Beware the Rooster Ratio
If you’re hatching eggs at home, know that roughly 50% will be roosters. Have a plan for them—many cities don’t allow roosters, and they can’t all stay in your backyard.
There’s No One Right Way
Both options come with their own learning curves—and both are valid. Raising chicks helps you understand every stage of chicken development, while buying pullets gets you faster results and less setup. You can even go with the old fashioned method of having chickens incubate their own eggs.
No matter which path you take, what matters most is preparation, patience, and giving your flock the care they need to thrive.
Daily, Weekly & Monthly Chicken Care
Once your chickens are settled into their new coop, the daily rhythm of chicken keeping begins. While the internet loves to say chickens are “set and forget,” the truth is a healthy flock requires consistent care. The good news? It’s simple, quick, and easy to fold into your morning or evening routine—especially if you’re already in the habit of walking your property or feeding other animals.
This section walks you through exactly what you’ll need to do each day, week, and month to keep your chickens healthy, laying, and living their best feathered lives.
🐓 Daily Chicken Care Routine
You can complete most daily chicken chores in 10–15 minutes, once in the morning and optionally again in the evening.
Morning Routine
- Let chickens out of the coop (if you don’t have an automatic door)
- Refill feeder if needed
- Refresh water
- Quick visual check for any signs of injury, lethargy, or odd behavior
- Collect eggs (if you’re home during the day, you can wait until afternoon)
Most keepers do a quick look around the run and coop during this time—checking the fence line, making sure the waterer isn’t frozen or slimy, and confirming the birds are moving normally.

Evening Routine (Optional, but Helpful)
- Collect eggs (again if needed)
- Top off water—especially in summer
- Close the coop securely to protect against predators
- Tidy up feeder area if it’s been scratched or soiled
If you’re busy, chickens can put themselves to bed naturally at dusk. You’ll just need to close the coop door after dark if you don’t have an automatic system.
🧹 Weekly Chicken Care Tasks
Once a week (we like Sunday mornings), it’s time for a deeper clean and a little more attention to the coop and run.
Weekly Tasks:
- Clean poop boards under roosts (if you use them)
- Fluff or top off bedding in nesting boxes
- Rake or stir bedding on the coop floor (if using deep litter method)
- Check for pests: Look under roosts and in corners for mites or lice
- Inspect fencing and locks for weak points
- Refill grit and oyster shell trays
If you’re using the deep litter method, stirring the bedding weekly helps keep it aerated and composting properly without odor.
Signs Something Might Be Off:
- Fewer eggs than usual
- Pale combs or droopy posture
- Uneaten food or dirty water
- Pecking or bullying
Any of these may mean a hen is unwell, laying issues are starting, or something’s wrong in the environment.
🗓 Monthly Chicken Care Routine
These tasks help prevent long-term issues and keep your coop running smoothly through the seasons.
Monthly To-Do List:
- Deep clean the coop (scrape, sweep, scrub with diluted vinegar or poultry-safe cleaner)
- Compost old bedding or spread in garden if aged
- Check for signs of rodents: Look for droppings or chew marks
- Inspect your hens’ feet for bumblefoot or other injuries
- Check feed supply—ensure it’s fresh and stored in a rodent-proof container
- Audit the run for drainage, dust bathing area quality, and shade

Seasonal Adjustments
Your care rhythm won’t change much, but the how of it shifts with the seasons.
❄️ Winter
- Check water multiple times a day to prevent freezing
- Add extra bedding for warmth
- Watch for frostbite on combs and wattles (apply Vaseline if needed)
- Use deep litter method for insulation
- Supplement light only if you want consistent egg production
☀️ Summer
- Provide constant access to shade and cool water
- Use electrolytes in water during heatwaves
- Freeze fruits or veggies for chilled treats
- Avoid feeding scratch grains mid-day (adds internal heat)
- Keep waterers in the shade to reduce algae and bacteria
Creating Your Rhythm
The best chicken keepers aren’t perfect—they’re consistent. Here’s what that might look like:
Example Weekly Rhythm:
- Daily: Feed, water, check birds, collect eggs
- Sunday: Stir litter, fluff nesting boxes, quick run clean
- Last Sunday of the month: Deep clean coop, inspect birds and fencing, reset supplies
Some folks keep a chicken log or checklist—especially during molting season, when health changes are more common. A printable coop care tracker or dry-erase board near the feed bin works wonders if multiple people share chores.
Bonus: Time-Saving Tools
If you’re short on time, here are a few upgrades that simplify care:
- Automatic coop door: Opens and closes at dawn/dusk
- Heated waterer: Prevents daily ice-breaking in winter
- Hanging feeder: Keeps feed dry and clean
- Covered dust bath: Reduces mud in wet seasons
- Motion-activated lights: Deter nighttime predators
You don’t need all of these from day one, but they’re worth keeping on your wishlist as your setup evolves.
Care That Keeps the Flock Thriving
Daily chicken care is simple and rewarding once it becomes a habit. With a reliable routine, you’ll catch problems early, keep your flock healthy, and enjoy a steady flow of fresh eggs and clucks of approval.
The real key? Observation. A few minutes with your birds each day will teach you more than any book or blog ever could.
Chicken Health, Problems & First Aid
One of the most reassuring things about backyard chickens is how hardy they can be. With a clean coop, good nutrition, and a watchful eye, many flocks go years without a single illness. But even experienced keepers occasionally face injuries, parasites, or egg-laying issues.
This section will walk you through how to spot problems early, respond confidently, and build a basic chicken first aid kit—without feeling like you need a veterinary degree.
🧠 Know What’s Normal First
Before you can spot what’s wrong, you need to know what healthy chickens look and act like. A healthy hen is:
- Bright-eyed, alert, and curious
- Walking and scratching regularly
- Eating and drinking consistently
- Preening and dust bathing
- Laying regularly (if at point of lay)
- Sporting a red, plump comb and wattles
It’s normal for chickens to rest in the shade mid-day, look scruffy during molt, or lay fewer eggs in winter. What’s not normal is sudden behavior changes, discharge, or physical symptoms like drooping wings or limping.
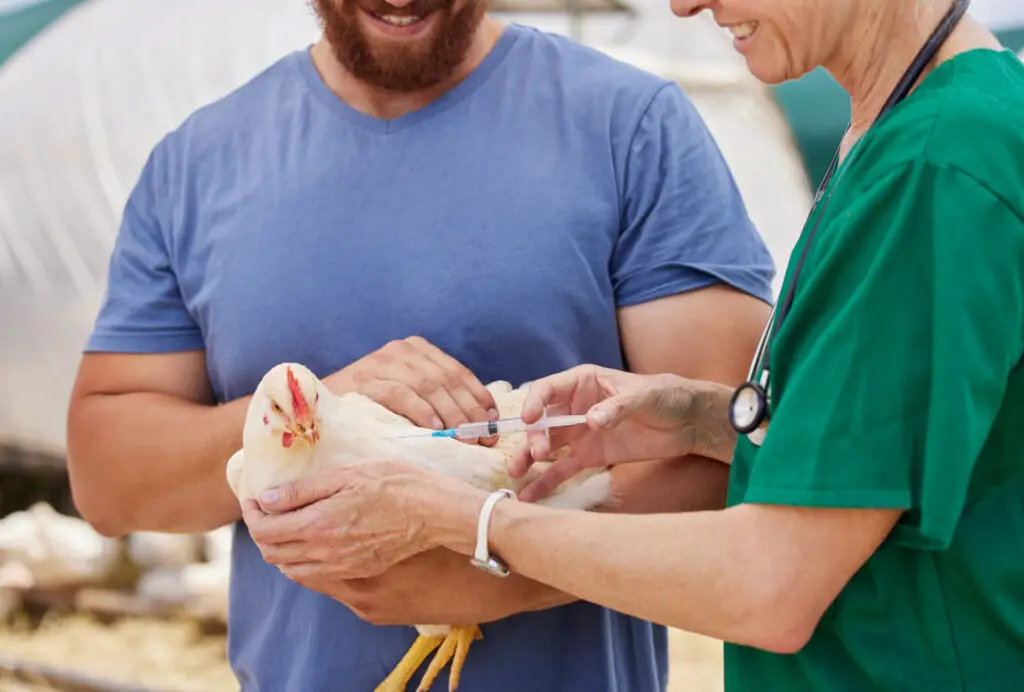
🐔 Common Chicken Health Issues
🦠 Coccidiosis
- Most common in chicks or young birds
- Caused by a parasite in the intestinal tract
- Symptoms: Bloody or watery poop, lethargy, huddling, loss of appetite
- Treatment: Medicated chick starter, or liquid Corid (amprolium) added to water
🪳 Mites & Lice
- External parasites that live on skin or in feathers
- Symptoms: Excessive preening, bald patches near vent, scabby combs or legs, reduced laying
- Treatment: Clean coop thoroughly, dust birds with poultry-safe permethrin powder or spray; repeat in 7 days
🐣 Egg Binding
- Happens when a hen can’t pass an egg
- Symptoms: Straining, lethargy, tail pumping, penguin-like stance
- Treatment: Soak in warm Epsom salt bath, isolate with low light, offer calcium (Tums crushed in water)
Egg binding can be fatal—treat quickly and consult a vet if no progress in 12–24 hours.
💨 Respiratory Illness
- Chickens are vulnerable to upper respiratory infections
- Symptoms: Sneezing, wheezing, nasal discharge, gurgling
- Causes: Dust, ammonia buildup, drafts, contagious illness
- Treatment: Improve ventilation, isolate sick birds, consider VetRx or antibiotics (consult a poultry vet)
🦶 Bumblefoot
- A foot infection from injury or poor roosts
- Symptoms: Swollen footpad, black scab, limping
- Treatment: Clean, soak, and treat topically—or consult a vet for severe cases
🧊 Frostbite
- Mostly affects combs and toes in cold, damp conditions
- Symptoms: Pale tips turning black, shriveled combs
- Prevention: Keep coop well-ventilated but dry, apply Vaseline to combs during cold snaps
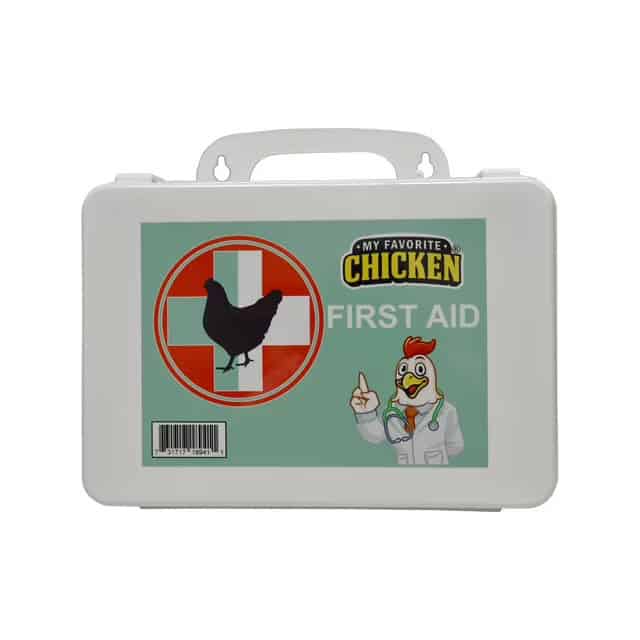
🩹 Basic Chicken First Aid Kit
You don’t need a full farm pharmacy, but having these basics on hand can help you act quickly:
Chicken First Aid Checklist:
- Epsom salt – For soaking feet and soothing egg-bound hens
- Blu-Kote or Vetericyn spray – Antiseptic for wounds (Blu-Kote also discourages pecking)
- Disposable gloves – For wound care or parasite checks
- Towels – For wrapping and calming injured birds
- Tums (calcium carbonate) – Emergency calcium source for egg-bound hens
- Syringes or droppers – For administering liquids or electrolytes
- Corid (amprolium) – For treating coccidiosis
- Poultry-safe wound ointment – Like Neosporin (no pain reliever added)
- Digital thermometer – Coop temps, not body temps
- Crate or small pen – For isolating sick or injured birds
- Electrolyte powder or Nutri-Drench – For hydration support
🧍♀️ When to Isolate a Chicken
If a hen is:
- Lethargic or not eating
- Bleeding or injured
- Sneezing, wheezing, or dripping mucus
- Being bullied or excessively pecked
Move her to a safe, calm isolation space like a crate or dog kennel in a warm garage or outbuilding. Keep her separate from the flock while you monitor and treat. Reintegration can happen once she’s fully recovered and symptom-free for 48+ hours.
🚨 When to Call a Poultry Vet
Most minor issues can be handled at home, but don’t wait too long to get help for:
- Severe or prolonged egg binding
- Swollen joints or abscesses
- Sudden paralysis
- Eye infections or significant discharge
- Signs of Marek’s disease or avian flu
Not all areas have poultry vets—but a mobile farm vet, livestock-experienced clinic, or state ag extension office may be able to help.
🧘 Prevention Is the Best Medicine
The best way to avoid chicken health crises is to create strong daily rhythms and a clean environment:
- Provide dry bedding and regular cleaning
- Offer balanced feed and clean water
- Give your chickens space, fresh air, and sunlight
- Check your flock daily and know what’s normal for each hen
- Quarantine new birds for at least 7–10 days before adding them to your flock
Keep a Watchful Eye, Not a Worrying Heart
Caring for chickens isn’t about being perfect—it’s about being observant and responsive. If something feels off, trust your instincts and investigate. Most health issues are treatable if caught early.
A healthy flock will reward you with not just eggs, but years of companionship, curious stares, and clucks that sound suspiciously like they’re judging your outfit.
Cold vs. Hot Weather Care for Backyard Chickens
Chickens are surprisingly hardy animals, but temperature extremes can still stress them—and sometimes kill them—if you’re not prepared. Whether you’re dealing with blistering summers or biting winters (or both), the key to seasonal chicken care is knowing what your flock needs, making small coop adjustments, and watching for signs of distress before things go wrong.
This section breaks down how to help your hens handle heat and cold, what supplies to keep on hand, and how to spot when the weather is taking a toll on their health or egg production.
❄️ Cold Weather Chicken Care
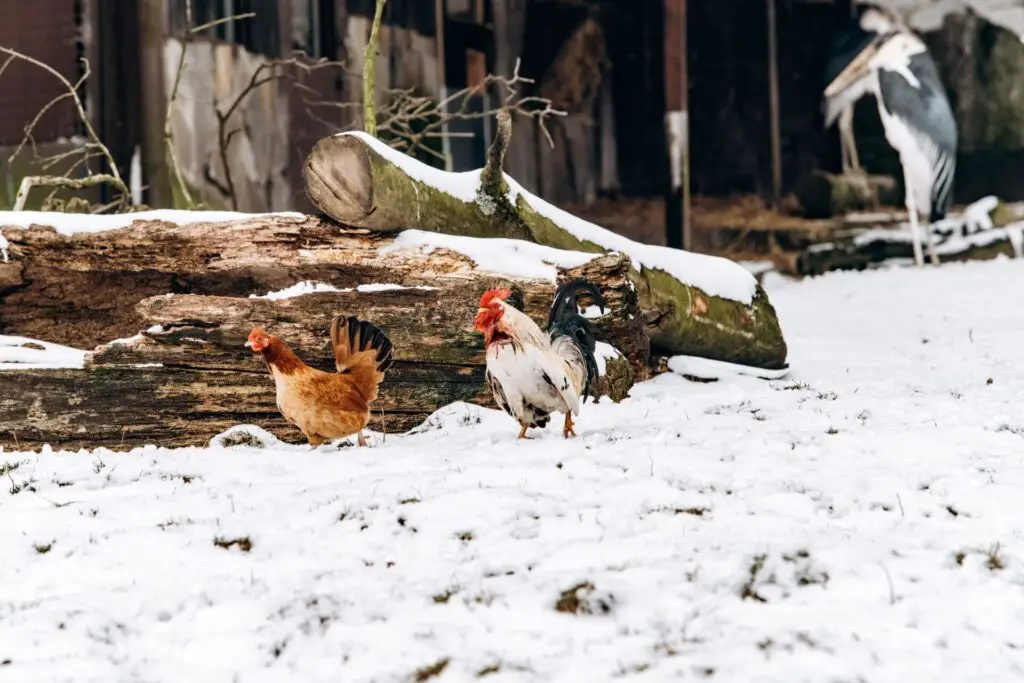
Most chickens tolerate cold far better than heat. As long as they’re dry, out of the wind, and well-fed, they’ll happily peck around on a frosty morning. Many backyard keepers in northern climates raise flocks that thrive through snow, ice, and even subzero temperatures.
That said, winter does require a few changes to your coop and daily routine.
🏠 Winter Coop Prep
- Block drafts—but don’t seal everything. Chickens produce a lot of moisture. Without ventilation, condensation can lead to frostbite. Keep upper vents open and dry bedding below.
- Deep litter method: Let bedding build up 8–12 inches deep. It insulates and generates gentle heat through composting.
- Raise waterers off the floor to prevent freezing from ground contact.
- Install a heated water base or switch waterers twice a day if you don’t have power.
🧊 Frostbite Prevention
Frostbite usually affects large combs or wattles, especially in damp or drafty coops.
Prevent it by:
- Keeping the coop dry and ventilated
- Applying Vaseline to combs on very cold nights
- Avoiding metal roosts or waterers that can chill the skin
If you notice blackened comb tips, isolate the bird from further exposure and treat with a gentle antiseptic ointment. The tissue will often scab and fall off.
🥚 What Happens to Egg Laying in Winter?
Many hens stop or reduce egg production in winter due to shorter daylight hours. This is normal. Laying is influenced by light more than temperature.
You have two choices:
- Let them rest (recommended for backyard flocks)
- Add a few hours of artificial light in the early morning to simulate spring
If you choose to supplement light, keep it consistent (12–14 hours total), and use a soft white LED on a timer. Never extend light into the evening—it disrupts their natural roosting instincts.
☀️ Hot Weather Chicken Care
While chickens can survive frigid temps, heat is far more dangerous. Once temps hit 85°F+, your flock is at risk for heat stress. Over 100°F, you need to take action.
🧊 Signs of Heat Stress
- Panting or open-beaked breathing
- Wings held away from body
- Pale combs or listlessness
- Fewer eggs or soft-shelled eggs
- Staying in the shade or refusing food
Severe heat stress can cause collapse, seizures, or death—especially in large or heavily feathered breeds like Orpingtons or Brahmas.
☂️ Keeping Chickens Cool
- Provide shade with tarps, umbrellas, or trees
- Use shallow pans of water for wading (some hens love it!)
- Add frozen water bottles or ice blocks to drinking water
- Offer cold treats like frozen peas, chilled watermelon, or cucumber slices
- Use electrolyte powder in water during heatwaves
- Ensure at least two water stations so everyone has access

🪶 Dust Baths & Cooling Behavior
Chickens instinctively cool themselves by:
- Dust bathing
- Spreading wings
- Reducing movement
- Digging into the dirt
Make sure they have a dry, shady dust bath area available at all times. You can mix in wood ash and diatomaceous earth to help with mites and cooling.
💧 Water Is Everything
Chickens can’t sweat. They regulate temperature through breathing and drinking. Even a few hours without water in high heat can lead to dehydration or death.
- Use nipple waterers or shaded open dishes
- Keep water clean, cool, and abundant
- Check water levels 2–3 times daily during heatwaves
In freezing weather, use heated bases or swap out fresh water in the morning and late afternoon. Chickens will drink less when it’s cold, but they still need access at all times.
🥶 Summer vs. Winter Feeding Tips
In Winter:
- Offer scratch grains or cracked corn before roosting to generate heat overnight
- Add a little black oil sunflower seed (high fat and calories)
- Avoid overfeeding treats—nutritional balance is key when forage is low
In Summer:
- Avoid corn-heavy scratch during the heat of the day (it raises body temp)
- Feed early in the morning or late evening when it’s cooler
- Focus on hydrating treats (melon, cucumber, berries)
- Add extra calcium if eggshells get thinner in heat
🛠 Quick Coop Upgrades by Season
| Season | Helpful Additions |
|---|---|
| Winter | Deep litter, wind blocks, heated waterer |
| Summer | Shade tarps, fans (safe & enclosed), extra waterers |
Pro tip: Keep a weather journal for your flock—note when they lay more or less, how they handle temp swings, and what changes help. It’s one of the best ways to adapt your setup over time.
Build for the Weather You Actually Have
You don’t need to pamper your chickens—but you do need to prepare your setup for seasonal shifts. Most weather-related health issues are preventable with good coop design, clean water, and a few thoughtful adjustments throughout the year.
Trust your hens—they’re smarter than people give them credit for. But when the thermometer swings, it’s up to us to give them what they can’t create for themselves: shelter, airflow, and fresh water.
What About Roosters?
Here’s something many beginners don’t realize right away: hens don’t need a rooster to lay eggs. They’ll do it all on their own, whether there’s a male around or not. That fact alone leads a lot of new chicken keepers to ask—should I even keep a rooster at all?
The answer depends on your goals, your local regulations, and how you feel about a little extra noise (or a lot).
Do You Need a Rooster?
If you’re raising chickens for fresh eggs and companionship, you don’t need a rooster. Hens are perfectly content without one, and in many cases, life is simpler that way. But if your plans include hatching your own chicks or building a self-sustaining flock, then yes—a rooster becomes essential.
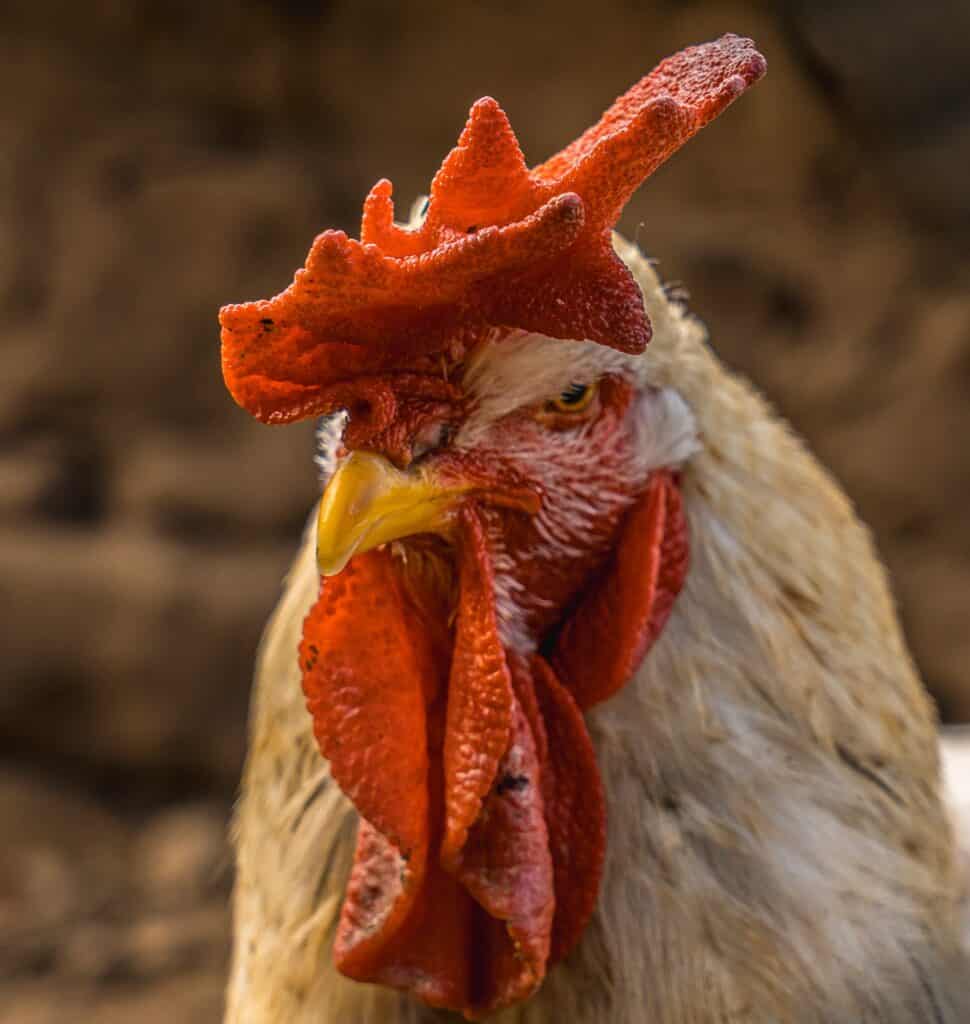
Roosters’ main job is fertilizing eggs, but they also act as flock protectors and peacekeepers. You’ll often find them standing watch while the hens eat or rushing toward unfamiliar sounds. Some even break up squabbles between hens. Others… cause a few squabbles of their own.
The Good and the Not-So-Good
A well-mannered rooster can be an asset, especially in a free-ranging flock. The right one will call hens to treats, chase off small predators, and help maintain flock structure. Roosters are often beautiful birds, too—bold colors, big tails, and those unmistakable calls that make a backyard sound like a proper little farm.
But not every rooster behaves himself. Some get aggressive, especially during breeding season or when they hit adolescence. They may challenge humans (including kids), overbreed their hens, or crow constantly—not just at dawn, but whenever they feel like asserting their presence.
Many first-time chicken keepers don’t realize that crowing isn’t limited to sunrise. Roosters can—and will—crow at 3 p.m., 10 p.m., and yes, even 3 a.m. They’re responding to changes in light, sounds, or simply their own mood.
Are Roosters Legal in Your Area?
This is where you need to do some homework. While most cities and even suburban areas allow a handful of hens, many ban roosters entirely. It’s almost always due to the noise. Even in rural neighborhoods, homeowners’ associations may restrict or prohibit them.
If you’re unsure, check your local zoning laws and ordinances before deciding to keep a male bird. It’s not uncommon for first-time owners to discover the rules only after a neighbor complains.
Surprise Roosters: What If You End Up With One
If you’re raising chicks, there’s always a chance one of them might turn out to be a rooster—even if you ordered “sexed” pullets from a hatchery. Chick-sexing is accurate about 90–95% of the time, but mistakes happen.
Around 6 to 10 weeks old, you might start noticing signs: one chick grows faster, develops a larger comb and wattles, starts chest-bumping the others, or makes a sound that’s almost—but not quite—a crow.
If you do end up with a surprise cockerel and you can’t legally (or logistically) keep him, you have options. Some folks rehome their roosters through local farm groups or 4-H networks. Others choose to process them for meat, particularly if they’re already raising birds for sustainability.
It’s a hard decision—but one worth thinking about before you bring home chicks.
What If You Want to Keep One?
If you’re in a rooster-friendly area and want to try keeping one, just be sure you have enough hens to go around. One rooster can easily overmate a small flock, which leads to stress, feather loss, and sometimes open wounds. Most experts recommend a minimum of 8–10 hens per rooster to keep the flock balanced.
Not all roosters are aggressive, by the way. Many are gentle, protective, and perfectly content to strut around while the hens go about their day. Some breeds—like Cochins and Brahmas—tend to be more mellow. Others, like Rhode Island Reds or game breeds, can be a little more intense.
If you decide to keep a rooster, it’s wise to observe his behavior closely during the first few months. Gentle nudges or flapping aren’t always a red flag, but charging, jumping at people, or attacking from behind is serious. Especially if you have children, you don’t want to risk keeping a bird that sees humans as a threat.
Alternatives to Keeping a Rooster
If you want to hatch your own chicks but can’t keep a rooster, there are still workarounds. Some keepers buy fertilized eggs from local breeders and incubate them. Others let a broody hen sit on fertile eggs from another flock. If you’re raising for eggs alone and don’t plan to breed, you truly don’t need a rooster at all.
You can still get the joy of a full egg basket, a peaceful flock, and even the occasional crow from a chatty hen (it happens more than you’d think).
Rooster Optional, Not Required
Roosters add color, personality, and (sometimes) chaos to the backyard chicken experience. They can be brave protectors and loyal flock leaders—but they also require more space, careful handling, and sometimes a thicker skin when crowing starts before the sun does.
If you’re just starting out, there’s absolutely nothing wrong with building a hens-only flock. You’ll still get all the benefits of backyard chickens—eggs, compost, entertainment, and a connection to your food—without the added complexity.
But if a rooster does turn up in your brooder box and you decide to give him a chance, watch and learn. Just like the rest of us, he’s trying to figure out his role in the flock. Sometimes that role fits just fine—and sometimes it’s time to pass the baton to a quieter coop.
When Chickens Start Laying & Egg Tips
There’s something magical about finding that first egg in the coop. It’s usually smaller than you expect, sometimes oddly shaped, and occasionally has a soft shell. But it’s yours—or rather, hers—and it’s the first tangible sign that your flock is settling into maturity.
For beginner chicken keepers, the lead-up to laying time is full of anticipation and questions. When will they start? What does a laying hen act like? Is it normal for an egg to be… rubbery?
Here’s how to know your girls are almost ready, what early eggs can look like, and how to keep egg production steady and healthy over time.

🐣 When Do Hens Start Laying?
Most hens begin laying around 18 to 22 weeks of age, though this depends on breed, diet, daylight hours, and even individual temperament.
- Production breeds like Leghorns or Australorps may lay as early as 16 weeks.
- Heavier breeds like Orpingtons, Cochins, and Brahmas might take closer to 24–28 weeks.
- Season matters, too: Pullets maturing in fall may delay laying until spring unless they have supplemental light.
That means if you get chicks in March, you might see your first eggs in late July. If you raise them in September, they may not start until early spring—after the days begin to lengthen again.
🐔 Signs Your Hen Is Ready to Lay
The shift from pullet to layer often comes with small changes in behavior and body.
You might notice:
- Her comb and wattles turn redder and plumper.
- She starts squatting when you approach—a submissive posture that looks like a half-sit.
- She becomes more interested in nesting boxes, scratching or sitting in them.
- You hear new clucks, trills, and egg songs—hens often announce their accomplishment.
- She seems restless, pacing or rearranging bedding in quiet corners of the coop.
Some hens ease into laying like seasoned pros. Others lay their first egg in the feeder, on the floor, or even outside. (You’ll learn to check under bushes during free-range hours.)
🥚 What First Eggs Look Like
The first few eggs from a young hen—called pullets’ eggs—are often a little… weird.
They might be:
- Small or round
- Pointy at one end
- Double yolked
- Shell-less or soft-shelled
- Slightly misshapen or chalky
This is completely normal. It takes a few weeks for a hen’s reproductive system to settle into a rhythm. Within a month or so, she’ll likely be laying regular-sized, properly shelled eggs on a consistent schedule.
🧺 How to Encourage Nesting Habits
You can’t rush nature, but you can set your hens up for success by making their nesting boxes inviting and consistent.
- Have one box for every 3–4 hens. Too few boxes creates stress; too many causes confusion.
- Line boxes with soft bedding like pine shavings or straw. Nesting herbs can help keep them fresh.
- Place fake eggs or golf balls in the boxes to signal, “This is where eggs go.”
- Keep the area quiet, dark, and clean—hens prefer calm, private spaces to lay.

🍳 Egg Laying Tips for Beginners
Once your hens are laying, here are a few tips to keep things running smoothly:
✅ Collect eggs at least once a day
This keeps them clean, reduces the risk of breakage, and helps prevent hens from going broody or predators from being tempted.
✅ Offer supplemental calcium
Even with layer feed, some hens benefit from free-choice oyster shell or crushed eggshells to maintain strong shells—especially in summer heat or after illness.
✅ Watch for laying problems
Soft-shelled or no-shelled eggs can be caused by calcium deficiency, stress, or heat. If it happens occasionally, it’s fine. If it’s frequent, recheck their nutrition and overall health.
✅ Expect seasonal slowdowns
Shorter days = fewer eggs. Some breeds lay through winter with no problem; others stop completely until spring. You can add a light source on a timer (12–14 hours of light/day), but many backyard keepers let nature lead.
🧼 Cleaning & Storing Eggs
Backyard eggs don’t need to be washed immediately—especially if they’re clean. In fact, eggs come out with a natural protective coating called the bloom that keeps bacteria out.
- If they’re clean: Store them unwashed on the counter or in the fridge (depending on your climate and preference).
- If dirty: Gently dry brush off debris. Only wash with warm water just before use or refrigerate them if washed immediately.
When Things Seem Off
Even after they’ve started laying, hens may take random breaks due to:
- Molting (shedding feathers—often around 12–18 months old)
- Stress from predators, flock changes, or heat
- Illness or parasites
- Short daylight hours
- Age (older hens may taper off production after 2–3 years)
Occasional gaps in laying are normal. But if your best layer suddenly stops, isolate her, monitor closely, and check for signs of worms, lice, or injury. Sometimes it’s just a pause; other times, it’s the first sign something needs attention.
The Egg Basket Begins
The first egg is a milestone—for your hen, and for you. It marks the moment when your daily care, patience, and coop prep begin to return a tangible reward. It’s easy to get fixated on numbers—how many eggs, how often, how big—but don’t forget to enjoy the process.
There’s something delightfully humbling about walking out to the coop each morning, not knowing what you’ll find. Some days it’s three perfect brown eggs in a row. Other days it’s a half-cracked one on the floor, and someone looking very proud of herself.
That’s the joy of backyard chickens: a little unpredictability, a lot of clucking, and the quiet rhythm of something ancient and ordinary unfolding right in your backyard.
What to Expect in Your First Year of Raising Chickens
Your first year with chickens will teach you more than any book or blog post ever could. It’s a hands-on education in observation, patience, and rhythm. You’ll figure things out by doing, by noticing, and sometimes—let’s be honest—by Googling something at 6 a.m. in a bathrobe after a hen makes a weird noise you’ve never heard before.
This chapter of your chicken-keeping journey is about settling in—building routines, learning your flock’s quirks, and adapting as the seasons change.
Here’s what you can expect, month by month, emotion by emotion.
🐣 Spring: The Excitement of New Beginnings
Whether you’re starting with chicks or pullets, spring is when everything feels fresh and full of potential. The weather is mild, the days are getting longer, and every peep and cluck is new.
You’ll spend this time:
- Getting your brooder or coop set up
- Watching for signs of growth or laying readiness
- Checking water and feed obsessively (we all do it)
- Bonding with your birds—some may even jump into your lap
If you’re raising chicks, you’ll likely spend your first six weeks hovering over the brooder like a helicopter parent. That’s normal. And sweet. And a little exhausting.

🐓 Summer: Settling into the Routine
By summer, your birds are feathered out, in the coop, and starting to act like a proper little flock. You’ll learn their rhythms, their pecking order, and maybe a few of their favorite places to hide eggs (or themselves).
This is when:
- First eggs usually arrive (cue celebratory text to everyone you know)
- You learn to open and close the coop without spilling feed everywhere
- You discover that chickens are tiny feathered comedians, full of antics
- You might hit your first challenge—heat stress, parasites, or a surprise rooster
Most keepers find their groove in summer. Morning chores become habit. You stop double-checking everything. You trust yourself a little more.
🍁 Fall: Change in the Air
As daylight shortens and the weather cools, your chickens will shift too. Some may start molting—dropping feathers everywhere and looking half-naked for a few weeks. Egg production often dips, sometimes dramatically. Don’t panic. It’s normal.
In the fall:
- You’ll begin winterizing the coop—adding bedding, blocking drafts, checking for leaks
- You’ll watch for the first signs of frost and make waterer plans
- You might reevaluate your feed or consider a light supplement for egg laying
- You’ll start to recognize which hen lays which egg
This is the season where your flock transitions from “new” to normal—they’re part of your routine now, like coffee and mail and walking the fence line.
❄️ Winter: The Quiet Season
Chickens are resilient, but winter brings new rhythms. There are fewer eggs, more chores in the cold, and sometimes—just sometimes—you wonder if it’s worth it.
It is.
You’ll find peace in the quiet clucks of a content flock on a snowy morning, the warm steam rising from the coop when you open the door, and the small but real satisfaction of checking “care for chickens” off your list when everything else feels still.
In winter, you’ll:
- Check water multiple times a day
- Use deep litter for warmth
- Be tempted to add heat lamps (resist unless absolutely necessary)
- Watch your flock huddle together on the roost, content and calm
🧠 The Emotional Curve of Chicken Keeping
The first year has a rhythm all its own—not just seasonally, but emotionally.
Month 1: Giddy. Overprepared. Taking 200 chick photos a day.
Month 3: Confident. Curious. Minor panic when someone sneezes.
Month 6: Egg ecstasy. Showing off your basket like a proud parent.
Month 9: Reality check. You lose your first bird to illness or a predator.
Month 12: Grounded. Capable. Ready to expand… or grateful you didn’t.
There will be mistakes. Maybe you didn’t predator-proof the coop enough. Maybe you forgot to lock up one night. Maybe a hen got injured and you didn’t notice right away. It happens. We all learn as we go.
💛 The Unexpected Joys
Nobody tells you that chickens might follow you around the yard like puppies. That you’ll learn their individual clucks. That you’ll have a favorite—and that when she jumps on your lap for a scratch, it’ll feel like a little gift.
They’re not just livestock. They become part of your life’s daily rhythm. Part of the backdrop to your garden, your morning coffee, your last-minute dashes outside in the rain.
And in the quiet moments, as you collect warm eggs from straw-lined boxes, you’ll feel something that doesn’t have a name—but feels a lot like peace.
A Year of Learning, Loss, and Deep Satisfaction
Your first year with chickens is messy, magical, and often filled with surprises. You’ll make mistakes. You’ll lose a bird or two. But you’ll also experience one of the most grounding parts of modern homesteading: caring for something that gives back every day.
And the best part? Year two is even easier.
Tell me—what surprised you most in your first year of chicken keeping? Or if you’re just getting started, what are you most excited (or nervous) about?
Drop a comment below or sign up for the Waddle & Cluck newsletter for seasonal tips, coop upgrades, and a little encouragement when you need it most.


Love the tip about rotating the run area—my hens are way more active now that they’ve got fresh grass patches to explore!
That’s fantastic! Our chickens LOVE hunting bugs. It’s their favorite activity.