Raising baby chicks and ducklings can be an incredibly rewarding experience. Watching those little fuzzy bodies grow day by day brings such joy. However, in order to help them thrive, you need to provide a proper housing environment right from the start. The good news is that housing baby chicks and ducklings doesn’t have to be complicated or expensive. With some simple planning and basic supplies, you can easily create a nurturing space for them to live.
We are right in the middle of baby season and are using several different techniques for brooding and housing.

Location Considerations
When deciding where to house your baby birds, choose a spot that will work well as they grow. Make sure they will have adequate ventilation, protection from predators, and easy access to the outdoors when they are old enough. An existing shed, garage or barn can often be modified to accommodate them. You can also use a specialty brooder designed just for baby poultry to create a chick brooding area.
For the first few weeks when they are unable to regulate their own body temperature, it’s ideal to keep baby chicks and ducklings somewhere indoors that will stay warm and draft-free at all times. A basement, mudroom, bathroom or laundry room tends to work nicely. Just clear out enough floor space for their initial brooder setup. Then plan to move them to a larger, more permanent coop and run outside after 4-6 weeks when their feathers come in or when temperatures are right.
We have a temperature-controlled shop where we house the babies while they are in brooders. It helps in maintaining their temperature and keeps the smell (they can get stinky) down.
Brooder Essentials for Housing Baby Chicks and Ducklings
For the beginning weeks after hatching, chicks and ducklings need extra environmental support that mimics a mother hen. A brooder provides controlled heating, safe containment, adequate ventilation and easy access to food and water. Setting up this temporary habitat lets you raise happy, healthy babies until they transition outdoors.
For just a few chicks or ducklings, a simple cardboard brooder box can make an inexpensive and effective home. You’ll want a box large enough to provide adequate space for the birds to move around while still retaining heat. The sides should be high enough to contain the baby birds as well.
A plastic storage tote or large Styrofoam cooler can also work very well. Just be sure to cut out ventilation holes around the top edges. Place the heat source to one side so the birds can self-regulate their temperature by moving closer to or further away from the warmth.
We have three different types of brooders that we rotate through depending on the needs of the chicks.
Heating
Unlike their adult counterparts, baby birds cannot control their own body temperature during the first weeks of life. Chicks and ducklings require a consistently warm environment ranging from 90°F to 95°F shortly after hatching. As they grow feathers and mature, decrease the temperature by 5°F each week until reaching 70°F. At this point, they can withstand cooler, outdoor temperatures without issue.
Heating plates, heat lamps, radiant heat panels or even reptile heating pads all work well to warm a brooder space. Adjust positioning as needed to create a temperature gradient allowing the babies to move closer to or further away from the heat source as desired.
The housing should be fully prepped and warmed up prior to the arrival of your new chicks. Allow yourself ample time to set up, test temperatures, and make any adjustments needed to the habitat before hatch day or before picking up your new chicks.
The first type of brooder we use is plastic and has two heat lamps at the top. This is a great brooder for weeks 1-2 or until the chicks seem to be getting too warm because it maintains a warmer temperature very well. We just moved baby chicks out of this brooder this morning.

Signs of being too hot include panting, moving away from the lights, or not huddling up in a pile to sleep.
We usually take one of the light bulbs out of this one after week 1 to offer a cool side and a warm side. That way we can observe how warm the chicks feel without getting to the point of panting.

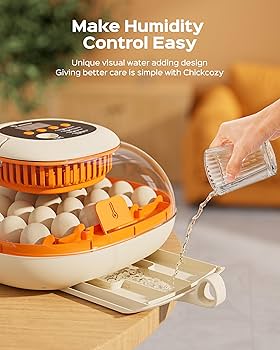
Once the chicks are too warm in this small brooder we move them to a larger brooder with a heating plate they can crawl under instead of the overhead lights. I love the one we got form Rent-A-Coop. It has a removable base for easy cleaning and came with the perch proof heating plate, a food dispenser and waterer. The top velcros on for easy cleaning and access. It also has lots more ventilation to keep humidity down. This is perfect for out 2 week old chicks and they can stay there until they are ready to go out to the coop if the weather is consistently above 65 degrees or unless they get too big for the space.


RentACoop Little Red Barn Folding Chick Brooder Set
- All-In-One Set includes Brooder, Heat Plate, Feeder, and Waterer
If the chicks outgrow the Rent-A-Coop, or if you are raising ducks or geese, you may need a larger brooder. We needed a larger brooder for our chicks this season as they outgrew the Rent-A-Coop and it was still getting close to freezing at night. In that case, we move to a large 150-gallon Rubbermaid tub from Tractor Supply with a lid we made from an old slatted bunky board. This keeps the babies from jumping out, but still allows plenty of airflow.

The tub is currently drying from yesterday’s cleaning.
Bedding Material
Cover the entire brooder floor with 2 to 4 inches of soft litter to provide traction and protection. I recommend starting with just 1 inch for the first week.
Pine shavings work very well, absorbing moisture and limiting messy clean ups. Start with virgin pine to avoid exposure to harmful phenols released in soiled bedding. Spot clean waste and wet areas daily, replacing the entire bedding layer weekly or whenever it becomes excessively soiled. We like to put a puppy pad under pine shavings for easier clean up. You can just roll up the puppy pad with the litter in it.
If you prefer, rice hulls, coarse sand or straw can also make suitable brooder litter alternatives. However wood chips, fine sand, soil or grass clippings may cause health issues if consumed by mistake. Prevent babies from eating bedding by providing proper nutrition and grit sources.
Food and Water Access
Baby birds need immediate access to starter feed and clean water around the clock. Use specialized non-tip chick feeders and waterers designed for small fowl, refilling them frequently. Scatter starter feed directly on the brooder floor as well. This gives every bird an equal chance at the nutrition they need, especially weaker ones less apt to compete. It also allows them to start foraging for food and keeps them entertained.
I highly recommend keeping different species seperate to prevent bullying. Smaller chicks cannot compete with the appetite and size of ducks.

Custom Brooders
With a little work and a few basic construction skills, you can build a more customized brooder habitat for your flock. Having a larger space allows you to house many chicks or ducklings together and may be a wise idea if you plan to expand your flock. Consider sizing the pen to match the number of birds you intend to raise.
Some simple wooden brooder designs you can make at home include:
Plastic Tote Enclosure: Use an electric drill to cut ventilation holes around the upper portion of a large plastic storage bin. Then build a wooden frame to fit snugly over the top edges. This creates more headroom inside while containing the baby birds. Attach wire mesh over part of the frame for added circulation.
Single Sloped Roof Pen: Construct an A-frame style enclosure from wood panels and beams. Having one side of the ceiling slightly angled allows for a heat lamp to be mounted internally off the higher point. Make sure to include vents along the upper perimeter.
Tiered Brooder: Build stacked enclosures with a heat source overhead through the use of interlocking wood panels. Connecting multi-level pens uses space efficiently and lets you separate birds by size or type.
Portable Run: Mount casters or wheels to the base of a homemade brooder box. Adding mobility allows the habitat to be transferred outdoors on fair weather days for some fresh air and sunshine. Just make sure to bring it back indoors (or have a heat source outside) when temperatures drop.
Barn or Coop Nurseries
For those looking to raise a large number of chicks or ducklings, dedicating an entire section of an existing barn or chicken coop as a brooder area may be the best solution. You’ll have ample room to create spacious pens and the young birds can acclimate well to the environment they’ll live in at maturity.
To set up a nursery space in an outbuilding, you’ll need to thoroughly clean the area first and install new litter material. Make any repairs and block off holes or gaps where drafts could enter. You may need to add supplemental heating depending on the existing insulation. Plan your layout wisely if establishing permanent divided brooder zones.

Tips for Brooder Comfort and Safety
Once you have the housing frame in place, finishing it with the necessary accessories is vital to promoting health, warmth and good sanitary conditions. Here are some key tips:
- Use hardware cloth or chicken wire to cover any walls or openings to keep predators out and contain baby birds. You would be surprised at the spaces baby chicks can squeeze through!
- Hang feeders and waters at chick height to make access easy. Raise them periodically as the birds grow.
- Spot clean the brooder daily by removing wet litter and waste. Dump, clean and replace the entire bedding layer weekly.
- Wash all feeders and waterers thoroughly every few days with soap and water. Rinse well.
- Adjust temperature by raising or lowering heat lamps as needed to maintain ideal comfort levels.
- Make sure the habitat is fully predator and pest proof. Seal any structural vulnerabilities.
- Position extra feed and bedding nearby for quick replenishing when needed.
Transition Planning
The brooder phase for chicks averages 4-8 weeks before they can transition to outdoor coops. Ducklings develop quicker feather coverage and can move out around 2 weeks earlier. Prepare their permanent housing ahead of time, allowing a week for adjustment to the new space.
Once fully feathered and hardy, they’ll be ready to integrate into a mixed mature flock. Introduce the new chicks gradually to avoid any issues with the existing flock. Monitor all interactions closely as the birds establish hierarchy and harmony.
We have a small chicken coop that we place inside the existing chicken run that keeps the new chicks separate but near the existing flock so they can get used to each other.
Final Thoughts
Caring for a brood of fuzzy baby chicks or ducklings comes with big responsibility but offers many rewards. Ensure their health and safety by providing an adequately sized, clean and warm habitat tailored to their critical first weeks of life.
With simple construction or DIY modifications to materials on hand, you can easily create a protective space geared to your flock’s needs. Refer to trusted raising guides for expanded tips on nutrition, brooding temperatures, biosecurity and developmental milestones to look for. Identifying issues early and making adjustments prevents long term problems.
If you prepare their environment thoughtfully and nurture them through this vulnerable phase, you’ll have a thriving batch of vigorous juveniles ready to graduate on to a long and productive life as part of your backyard poultry family.