Toners don’t always get the love they deserve—but if you’re after clear, balanced skin, this DIY refreshing rosewater toner might become your new favorite. Made with natural ingredients and no harsh fillers, this homemade toner hydrates, calms, and brightens without stripping your skin. It’s the kind of gentle care your complexion craves—especially if you’re trying to avoid store-bought products packed with alcohol and synthetic fragrances.
Whether you’re new to natural skincare or just want a simpler, more sustainable routine, this rosewater toner is a beautiful way to start.

Why Make Your Own Toner?
There’s something empowering about making your own skincare products. It’s not just about saving money—though that’s a nice perk—it’s about knowing exactly what you’re putting on your skin. This DIY rosewater toner is:
- Gentle and effective: Made with soothing botanicals like rosewater and witch hazel.
- Customizable: You can tweak the recipe to fit oily, dry, or sensitive skin.
- Affordable: A few simple ingredients can replace a $30 designer toner.
- Low-waste: Reuse a small glass jar or bottle and skip the single-use packaging.
Homemade skincare also feels more personal. It’s one small way to slow down and care for yourself with intention.
What Does Rosewater Toner Do?
Rosewater toner helps rebalance your skin after cleansing by restoring pH, tightening pores, and prepping your face to better absorb serums and moisturizers. When combined with other natural ingredients, it can also:
- Calm irritation and redness
- Hydrate dry or tired skin
- Minimize the appearance of pores
- Fight acne-causing bacteria
- Brighten skin tone over time
Think of it as the bridge between cleansing and moisturizing—a lightweight layer of botanical nourishment.
Key Ingredients & Their Benefits
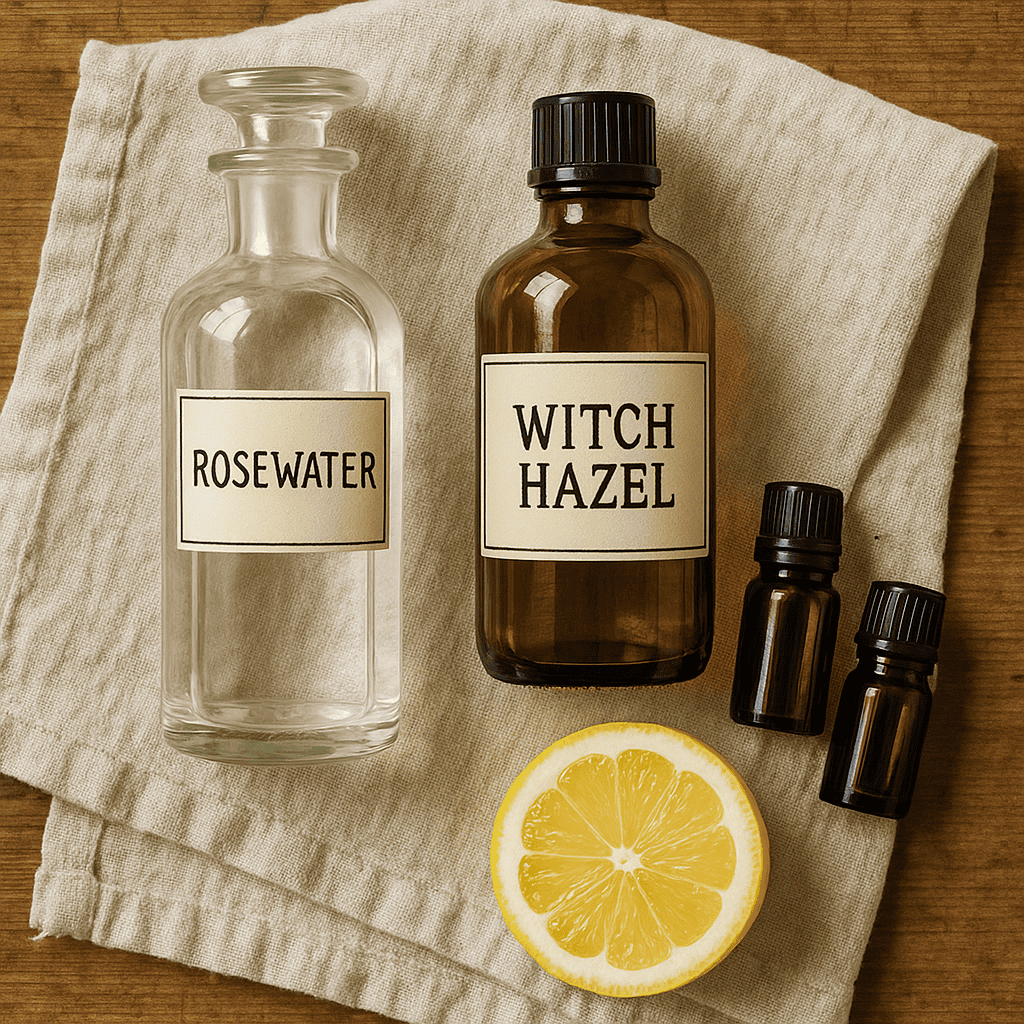
Rosewater
Distilled from rose petals, this fragrant water is naturally anti-inflammatory and soothing. It softens skin, tightens pores, and smells absolutely lovely.
Witch Hazel (alcohol-free)
A natural astringent, witch hazel helps control oil, reduce inflammation, and tone skin without over-drying—especially when you choose a version free of alcohol.
Lavender Essential Oil
Calming, antibacterial, and antioxidant-rich, lavender oil is great for sensitive or maturing skin. Plus, it brings a little aromatherapy to your routine.
Tea Tree Essential Oil
Known for its antimicrobial and acne-fighting properties, tea tree oil is perfect for oily or breakout-prone complexions. Use just a little—it’s potent!
Fresh Lemon Juice
Packed with vitamin C, lemon juice brightens skin and gently exfoliates, leaving your face feeling refreshed. Just a squeeze is enough.
📸 Add a flat lay photo of the ingredients with alt text: “Ingredients for DIY rosewater toner including rosewater, witch hazel, essential oils, and lemon.”
How to Use DIY Rosewater Toner
- Cleanse your skin as usual.
- Shake the toner bottle to mix any separated ingredients.
- Apply a small amount to a cotton pad or reusable cloth.
- Gently sweep over your face, avoiding the eye area.
- Let it absorb fully before applying serum or moisturizer.
- Use morning and night for best results.
💡 Tip: Store it in the fridge for a cooling, de-puffing treat—especially in summer.
DIY Refreshing Rosewater Toner Recipe
Ingredients:
- 1/4 cup alcohol-free witch hazel
- 1/4 cup rosewater
- 10 drops lavender essential oil
- 10 drops tea tree essential oil
- 1 tsp fresh lemon juice
Equipment:
- Clean 4 oz glass jar or spray bottle
- Small funnel (optional)
Instructions:
- Add witch hazel and rosewater to your clean bottle.
- Drop in the essential oils and lemon juice.
- Cap tightly and shake well.
- Store in the refrigerator and use within 1–2 months.

Tailor It to Your Skin Type
The beauty of this recipe is that it’s adaptable:
- Oily or acne-prone: Add more tea tree or swap lavender for rosemary essential oil.
- Dry or sensitive: Skip the lemon juice and use chamomile or calendula extract.
- Aging skin: Try geranium or frankincense essential oil for extra antioxidant power.
[Link to your “Sensitive Tummy? Here’s Why Your Dog Deserves a High Novel Protein Diet” as an example of gentle care—for pets and people.]
Storage Tips & Shelf Life
Because this toner is made with fresh ingredients and no preservatives:
- Keep it in the fridge to extend freshness
- Use within 1–2 months
- Always shake before using
- If it smells off or separates strangely, it’s time to make a new batch

Why Go Natural?
Drugstore toners often include:
- Alcohols that strip natural oils
- Fragrances that trigger irritation
- Unnecessary dyes and additives
When you make your own toner, you avoid all that. Plus, it’s a lovely way to slow down and take care of yourself. This isn’t just skincare—it’s homestead self-care.
Pair With Other Natural Skincare
Looking to round out your homemade skincare routine?
- Try this Grapefruit Honey Face Mask for extra hydration
- Learn how to grow herbs for skincare use in your garden
- Make your own Natural Cleaning Products
FAQ
Q: How long does DIY rosewater toner last?
A: Typically 1–2 months in the fridge. If it smells off or the ingredients separate, toss it and make a fresh batch.
Q: Can I use it on sensitive skin?
A: Yes—just skip the lemon juice and opt for calming ingredients like chamomile or calendula.
Q: Is it safe for teens or tweens?
A: Absolutely. This gentle toner is a great introduction to skincare for younger users—just test on a small patch first.
Q: Can I use it as a facial mist?
A: Yes! If you use a spray bottle, it makes a fantastic midday refresher.
Refresh Your Skin—and Your Routine
There’s something grounding about making your own skincare products—no fancy packaging, no marketing fluff, just simple ingredients that work. This DIY refreshing rosewater toner is a great place to start.
Tell me: have you tried making your own toner before? What ingredients do you swear by for clear, glowing skin? Let me know in the comments!
📬 Sign up for the newsletter for more homemade skincare recipes and seasonal homestead inspiration.
📌 Pin this post to save your skincare inspiration for later!
Print
Rosewater Refresh Toner
5 Stars 4 Stars 3 Stars 2 Stars 1 Star
No reviews
Revive and nourish skin with the Rosewater Refresh Toner. This natural, homemade toner blends soothing rosewater, pore-tightening witch hazel, and skin-calming essential oils. Antioxidant vitamin C brightens while lavender and tea tree oils protect against breakouts. Perfect for giving a healthy glow to all skin types. Refresh and rebalance your complexion with nature’s botanicals.
- Total Time: 5 minutes
Ingredients
- 1/4 cup witch hazel (astringent and soothing for skin)
- 1/4 cup rosewater (soothing and anti-inflammatory)
- 10 drops lavender essential oil (calming and antimicrobial)
- 10 drops tea tree essential oil (antimicrobial, helps fight acne)
- Squeeze of fresh lemon juice (vitamin C to brighten skin)
Instructions
- Add the witch hazel and rosewater to a clean, empty bottle or jar. A 4 oz bottle or mason jar works well.
- Add in the essential oils and lemon juice.
- Cap and shake well to fully incorporate all ingredients.
- To use, pour a small amount onto a cotton pad and gently wipe over clean face. Avoid getting into eyes.
- Store toner in the fridge for an extra cooling sensation. Should last 1-2 months.
Notes
You can play around with the essential oils based on your skin needs. Other options could include geranium, frankincense or ylang ylang oils. Use twice daily after cleansing for a healthy, radiant complexion.
- Author: Lindsey Chastain
- Prep Time: 5 minutes


