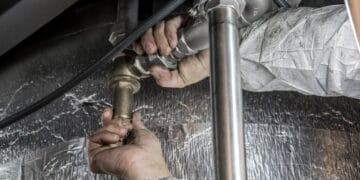

A homestead pest inspection is a regular walk-through of your home, barn, pantry, sheds, and outdoor storage areas to look for droppings, gnaw marks, nests, moisture, damaged wood, and easy entry points. Catching those signs early gives you time to seal a gap, protect feed, or call a professional before a small problem becomes an expensive one.
Pests are not only an annoyance on a working property. Rodents can spoil feed and chew wiring, insects can damage structural wood, and damp hiding places can support several problems at once. A good inspection is less about hunting every bug and more about noticing what has changed since your last round.
Why a Regular Homestead Pest Inspection Matters
Homesteads give pests almost everything they need: shelter, water, warmth, nesting material, and dependable food. A torn feed bag in a rarely opened shed can support mice for weeks. A slow plumbing leak can keep wood damp enough to attract insects. A stack of firewood against the house can create a protected bridge between the yard and the structure.
Regular checks help you connect small clues before they become a pattern. One dropping may be old. Fresh droppings in the same corner, a new gap under the door, and a chewed feed sack tell a different story. The goal is to find the source, remove what is attracting the pest, and block the route it uses.
Monthly inspections are a useful baseline, with an extra walk through when seasons change, after heavy rain, or when feed and stored produce move indoors. Keep the process simple enough that you will repeat it. A flashlight, gloves, phone camera, and a short checklist are usually all you need.
What You’ll Learn
Where Should You Look for Pests on a Homestead?
Work in the same order every time so you can compare one inspection with the next. Begin at the house, continue through animal and storage buildings, then finish outdoors. Shine your light along edges and behind stored items, since pests tend to travel beside walls and settle where they are less likely to be disturbed.
Basements, crawl spaces, and utility areas
Check foundation walls, sill plates, pipe penetrations, floor drains, and the ground beneath plumbing. Watch for damp spots, mud tubes, gnaw marks, shed insect wings, and droppings along the perimeter. A musty patch or new stain matters even when you do not see a pest, because moisture often creates the conditions that draw one in.
Attics and rooflines
Look for disturbed insulation, nesting material, droppings, daylight around eaves, and chewing on wires or wood. Inspect roof vents and soffits from a safe position. Do not reach into an unseen nest or step away from attic flooring. If you hear movement but cannot identify the animal safely, document where the sound is strongest and call a wildlife or pest professional.
Kitchens and homestead pantries
Inspect behind appliances, beneath sinks, inside lower cabinets, and around food containers. Pay special attention to flour, grain, pet food, seed, dried fruit, and home-preserved goods. Wipe shelves so new dust, webbing, droppings, or spilled food will be obvious next time. A well-organized working homestead pantry makes this much easier because you can see what you have and rotate it before packaging fails.
Barns, coops, sheds, and feed rooms
Look behind bins, under pallets, along door tracks, and in the corners of haylofts and tack rooms. Check feed bags for pinholes, frayed seams, greasy rub marks, or scattered grain. Move feed into lidded, chew-resistant containers and clean spills promptly. If you use automated equipment, include the hopper and the floor underneath it in your routine. Our guide to automated feeding systems for animal care explains how storage and delivery choices affect daily chores.
Barn cats can be part of a layered rodent plan, but they should not replace sanitation and exclusion. A healthy working barn cat may discourage rodents, while sealed feed and repaired gaps remove the reason rodents stay.
Woodpiles, compost, and the building perimeter
Walk the outside walls and inspect doors, vents, utility openings, foundation cracks, and places where siding meets soil. Keep vegetation trimmed enough to see the foundation. Store firewood away from the house and off the ground when practical, and avoid leaving boards or cardboard against a building. Turn and manage compost so it remains a working pile rather than an undisturbed shelter.
What Signs Reveal Rodents and Stored Food Pests?
Fresh rodent droppings are usually dark and may look slightly shiny, while older droppings fade and become brittle. Other clues include gnawed corners, shredded paper or insulation, greasy travel marks along walls, tracks in dust, and a stale or musky odor. Do not sweep or vacuum a heavy accumulation of droppings without first checking current public health guidance for safe cleanup in your area.
Stored food insects leave different evidence. Look for webbing, small holes in packaging, clumped flour, beetles or moths near shelves, and larvae in seams or corners. Isolate the affected package, inspect nearby goods, and clean the storage area thoroughly. Moving staples into clear, tightly sealed containers makes future activity easier to spot.
Flies also point to moisture, manure, spilled feed, or decaying material that needs attention. The most durable approach removes the breeding source first. These ways to keep flies away naturally can help you address the house, yard, and barn without relying on a single quick fix.
How Do You Recognize Termites and Other Wood Invaders?
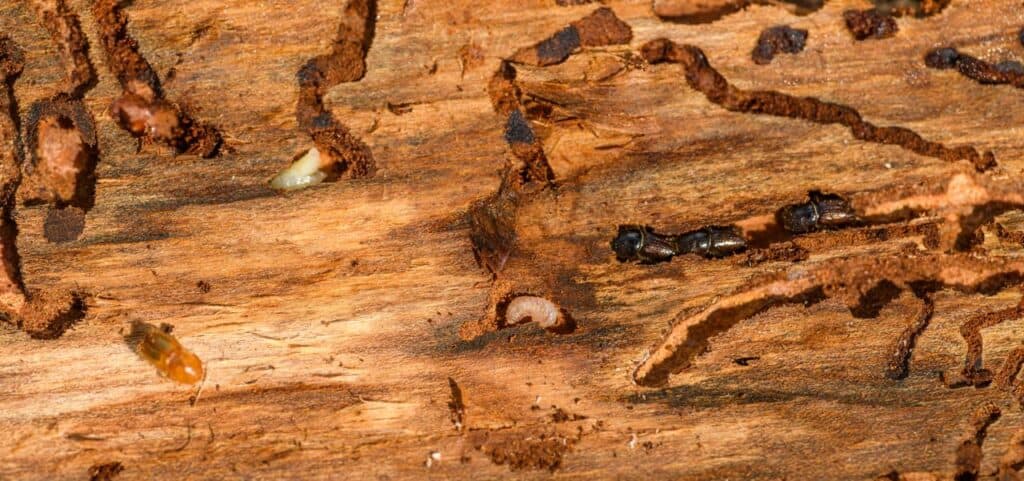
Termites, carpenter ants, and powderpost beetles can remain out of sight while damage grows. Possible termite signs include pencil-width mud tubes, discarded wings near windows or doors, blistered-looking wood, and wood that sounds hollow when tapped. Carpenter ants may push out coarse sawdust-like material called frass, while powderpost beetles can leave tiny round exit holes and fine, flour-like powder.
A visual check cannot always tell you whether damage is active, how far it extends, or which insect caused it. Photograph the evidence, avoid breaking open large areas, and get an identification before treating. The U.S. Environmental Protection Agency’s termite guidance notes that many structural termiticide applications require trained pest management professionals and that products must be used exactly according to their labels.
If you are comparing termite treatment products, treat the label as the controlling instruction. A product that kills visible termites is not automatically designed to protect an entire structure. Check the intended pest, application site, protective equipment, reentry instructions, and state or local requirements before buying or applying anything.
What Should You Do When You Find a Pest Problem?
Start by identifying the pest and the conditions supporting it. Remove accessible food, repair water leaks, clean spills, and seal appropriate openings. Trim branches away from the roof, repair damaged screens, add door sweeps, and replace failing weatherstripping. Around poultry, inspect the full enclosure while you are working. The same gaps that admit rodents may also weaken a predator-proof chicken run.
Choose controls that match the pest, the location, and the scale of the problem. Traps and exclusion may be reasonable for a small, accessible rodent issue. Structural insects, wildlife in walls, repeated infestations, contaminated ventilation, or any pesticide use near wells, food, feed, children, or animals may justify professional help.
When using a pesticide, read the entire label before opening the container and follow it exactly. Keep people and animals away as directed, protect feed and water, and never move pesticide into an unmarked food or drink container. More product is not better. Misapplication can expose your household, livestock, beneficial insects, soil, and water while still failing to solve the infestation.
How to Keep a Simple Pest Inspection Log
A useful log does not need to be elaborate. Record the date, weather or recent conditions, building or area checked, evidence found, photos taken, and action completed. Note whether the evidence looked new or old and set a date to check the location again. If you install a trap or monitoring station, number it so results are easy to compare.
- Date and location of the inspection
- Pest or evidence observed
- Likely food, water, shelter, or entry point
- Action taken and products used, if any
- Follow-up date and result
Patterns become useful over time. If mice return to one feed-room wall every autumn, you know where to inspect before temperatures drop. If ants appear after rain, check moisture and exterior gaps before reaching for a spray. If the same problem continues after reasonable prevention, your notes and photos give a professional a clearer place to begin.
Make Pest Checks Part of the Homestead Rhythm
Protecting a homestead is ongoing work, but it does not need to become a constant worry. Add a homestead pest inspection to another repeating chore, such as rotating pantry goods, cleaning the feed room, or checking smoke detectors. A steady routine turns vague suspicion into useful evidence.
The best inspection is the one that leads to a specific next step. Seal the opening, dry the damp area, move the feed, schedule the follow-up, or call the right professional. Those small actions protect the buildings, food, animals, and people that make the property feel like home.
Frequently Asked Questions About Homestead Pest Inspections
How often should you inspect a homestead for pests?
Inspect high-risk areas monthly and do a more thorough property check when seasons change, after heavy rain, or when feed and stored produce move indoors. Recheck any area with evidence sooner.
What should be on a homestead pest inspection checklist?
Include the home, pantry, attic, crawl space, barn, coop, feed room, sheds, woodpiles, compost area, foundation, doors, vents, plumbing, and utility openings. Record droppings, gnawing, nests, moisture, damaged packages, mud tubes, wings, holes, and frass.
What are the first signs of termites on a property?
Possible early signs include mud tubes on foundations, discarded wings, blistered wood, hollow-sounding wood, or damage near soil and moisture. Because other insects can leave similar evidence, get a reliable identification before treatment.
When should you call a pest control professional?
Call a licensed professional for suspected structural insects, wildlife inside walls, widespread or recurring infestations, contaminated ventilation, or treatments that require specialized equipment or licensing. Ask for the pest identification and a written control plan.