
Learning how to dehydrate apples is one of the simplest ways to turn a seasonal fruit pile into pantry food. The work is quiet and practical: wash, slice, pretreat if you want, load the trays, dry until leathery, condition, and store. You do not need a complicated recipe, and you do not need freezer space. A jar of dried apples can become snacks, oatmeal topping, trail mix, quick breads, simmered fruit, or a shortcut for desserts.
If you have apple trees, a good sale, or a box of mixed apples that need attention, dehydrating is often easier than canning. It is also forgiving. The pieces do not have to be perfect. Slightly bruised apples can be trimmed. Sweet apples make sweet snacks. Tart apples make excellent baking pieces.
For broader food-preservation basics, start with How to Start Preserving Food. For fruit-drying safety and technique, the University of Georgia/National Center for Home Food Preservation drying fruits guide is a reliable reference.
Key Takeaways
Choose the Best Apples
Use firm, ripe apples. Soft apples can still be dried, but they are harder to slice evenly and may make less attractive pieces. Sweet-tart varieties are especially good because their flavor concentrates as they dry. Try Honeycrisp, Granny Smith, Fuji, Pink Lady, Jonathan, Gala, or whatever local apples you have.
Avoid moldy fruit. Trim bruises and damaged spots. Wash apples well before slicing.
Peel or Leave the Skins?
This is preference. Skins add color, fiber, and a rustic look. Peeled apples are more tender and may be better for baking. If the apples are homegrown with thicker skins or cosmetic blemishes, peeling can improve texture.
An apple peeler-corer-slicer speeds up big batches, but a knife works fine. The main goal is even thickness.
Slice Evenly
Slice apples about 1/8 to 1/4 inch thick. Thinner slices dry faster and can become chip-like. Thicker slices take longer and stay chewier. Keep each batch as consistent as possible so you are not pulling some pieces early while others remain damp.
Remove cores and seeds. Rings are pretty, but half-moons and small slices are easier if you are working quickly.
Pretreat to Reduce Browning
Apples brown when cut surfaces meet air. Browning is not automatically unsafe, but pretreating gives a lighter finished color. You can use an ascorbic acid solution or lemon-water style pretreatment according to trusted preservation guidance.
If you do not care about color, you can skip pretreatment and dry the apples plain. They will darken some, but the flavor can still be excellent.
Drain slices well before loading the dehydrator. Excess liquid slows drying.
Load the Dehydrator
Arrange apple slices in a single layer with space for air to move. Pieces can be close, but they should not overlap heavily. Overlapping traps moisture and causes uneven drying.
Set the dehydrator according to the manufacturer’s fruit-drying directions. Many fruit-drying methods use around 135°F, but follow your machine and trusted guidance. Rotate trays if your dehydrator dries unevenly.
How Long Do Apples Take to Dehydrate?
Drying time varies. Slice thickness, apple moisture, humidity, dehydrator model, and tray load all matter. Thin slices may dry in several hours. Thick, juicy slices can take much longer.
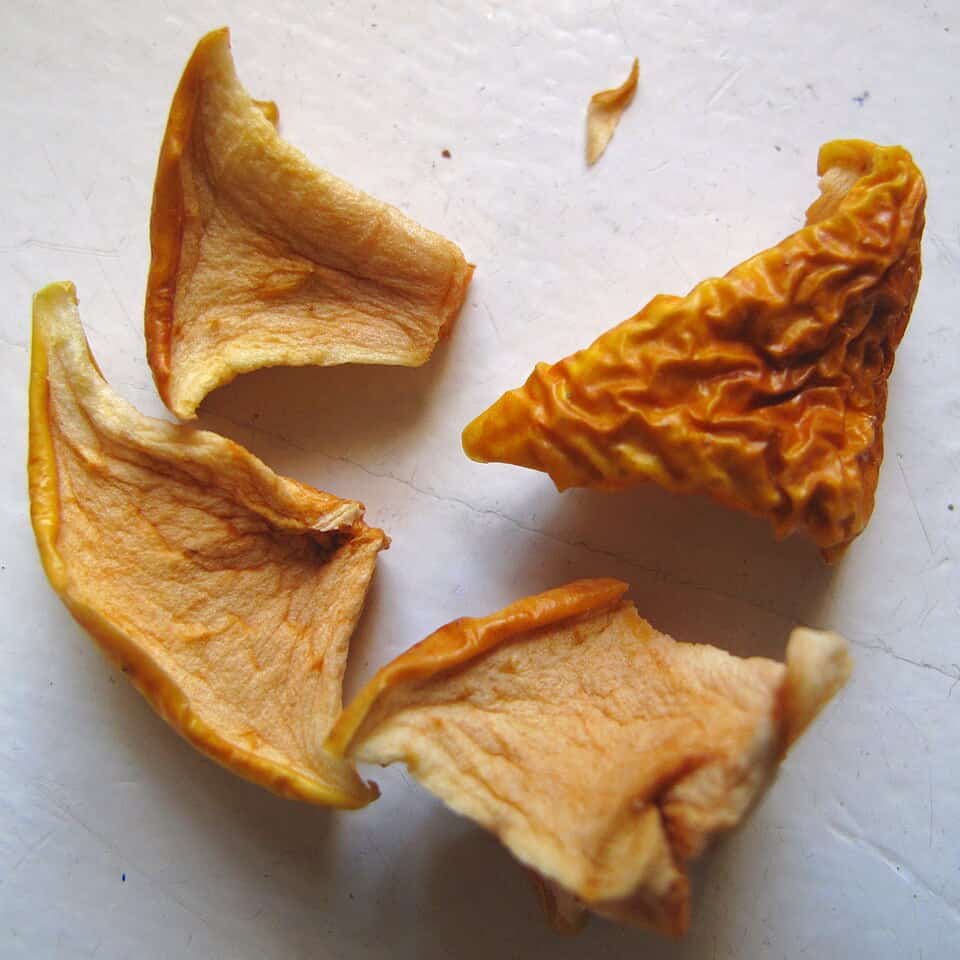
Do not rely only on the clock. Test the apples. They should be pliable or leathery with no beads of moisture when torn. If pieces feel cool and damp inside, keep drying.
Condition Before Storage
Conditioning is the step many beginners skip. After drying and cooling, place apples loosely in a jar for several days. Shake the jar daily. If you see condensation or pieces sticking from moisture, return them to the dehydrator.
Conditioning lets remaining moisture equalize between pieces. It reduces the chance that one slightly damp piece spoils the whole jar.
Store Dried Apples
Once conditioned, store dried apples in airtight jars, vacuum-sealed bags, or freezer containers. Keep them in a cool, dark, dry place. Label with the date. For longer storage, smaller containers are helpful because you open only what you need.
If you see mold, discard the batch. If the apples smell off, do not use them.
How to Use Dehydrated Apples
Eat them as snacks, chop them into oatmeal, add them to granola, simmer them with water and cinnamon, fold them into muffins, or rehydrate them for baking. They are also useful in quick desserts when you do not have fresh apples.
For fresh-apple baking inspiration, see Rustic Apple Crisp with Oats and Pecans. For another way to handle a larger apple harvest, Homemade Apple Butter is a good slow-cooked option.
Troubleshooting
If apples are sticky, they may need more drying time or better storage conditions. If they are brittle, they may be sliced thin or dried longer than necessary, which is fine for chips. If they turn very dark, pretreat next time or dry them sooner after slicing. If they mold in storage, they were not dry enough or were exposed to moisture.
Frequently Asked Questions About How to Dehydrate Apples
Do I need a dehydrator?
A dehydrator gives consistent results, but some ovens can dry fruit at very low temperatures if they allow airflow. Follow tested guidance.
Do dehydrated apples need refrigeration?
Properly dried and stored apples do not need refrigeration for short-term pantry storage, but cool storage improves quality.
Can I season apples before drying?
Yes. Cinnamon is common. Use a light hand so the apples do not become gritty or sticky.
Are dried apples crunchy or chewy?
They can be either, depending on thickness and drying time.