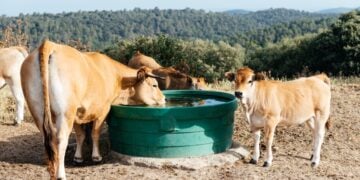

Learning how to milk a cow is one of the most satisfying skills on the homestead and one of the most dependent on consistency. A cow that is milked on a reliable schedule, with a complete hygiene routine, at the same time each day produces more milk, stays healthier, and becomes easier to manage with every passing week. A cow that is milked irregularly, without proper udder preparation, or with a technique that causes discomfort develops problems quickly. Mastitis, reduced production, and poor cow behavior in the stanchion are almost always connected to milking routine failures rather than to the cow herself.
If a goat is a better first step for your homestead than a cow, our guide to milking a goat covers the same fundamentals on a smaller scale.
Key Takeaways
How to Milk a Cow – Supplies
Before milking begins, have the following in place:
Equipment needed:
- A milking stanchion or head catch to restrain the cow safely and comfortably
- A clean stainless steel or food-grade plastic milk pail
- A strip cup with a dark screen or plate for checking milk before milking
- Pre-milking teat dip and a teat dip cup
- Post-milking teat dip and a teat dip cup
- Clean cloths or paper towels for teat washing and drying, one per cow
- Warm water in a clean bucket
- A milk filter and filter papers for straining milk after collection
- A glass jar or food-grade container for storing milk
The milking stanchion is the most important piece of infrastructure for learning how to milk a cow safely. A cow restrained in a well-fitted stanchion that holds her head securely while allowing her to eat hay or grain cannot kick forward and cannot swing away from the milker. Attempting to milk a cow without a stanchion while she is untrained and unfamiliar with milking creates an unsafe situation for both the cow and the person milking.
Train a new cow to the stanchion before her first milking by leading her in and offering grain while securing her head. Repeat this daily for one to two weeks before milking begins so she associates the stanchion with a positive feeding experience.
The Step-by-Step Process for How to Milk a Cow
Step 1: Bring the cow to the stanchion and secure her. Offer a measured amount of grain or hay to keep her focused and occupied during milking. A cow that has something good to eat is significantly calmer and more cooperative in the stanchion.
Step 2: Wash your hands thoroughly.
Step 3: Examine the udder visually. Look for swelling, redness, heat, or injury on any quarter. A healthy udder is evenly filled and symmetrical. Significant asymmetry between quarters can indicate a problem in the larger quarter.
Step 4: Forestrip each teat. Use your thumb and forefinger to strip two to three streams of milk from each teat onto the dark surface of the strip cup. Examine each stream closely. Normal milk is white, smooth, and fluid. Watch for clumps, strings, watery or off-color milk, or blood, which are signs of mastitis or injury requiring veterinary attention. Do not proceed with full milking if abnormal milk is present without understanding the cause.
Step 5: Apply pre-milking teat dip. Dip each teat fully in the teat dip cup and allow to contact for 30 seconds. This step reduces the bacterial load on the teat end before milking and is a primary mastitis prevention measure.
Step 6: Wipe each teat dry with a clean individual cloth or paper towel using a firm downward stroke. Use a separate cloth for each cow. Teat dip residue dilutes milk and should be fully removed before milking begins.
Step 7: Begin milking. Position the pail under the udder. Grasp the first teat between your thumb and forefinger, closing at the top to trap milk in the teat canal, then apply sequential pressure downward with your remaining fingers to express the milk. Release, allow the teat to refill from the udder, and repeat. The rhythm is squeeze, strip, release, repeat. Alternate between front and rear teats or milk adjacent teats simultaneously for efficiency.
Step 8: Milk each quarter completely until milk flow slows and the teat is soft and fully emptied. Incomplete milking leaves residual milk that signals the udder to reduce future production. Finish each quarter completely before moving to the next.
Step 9: Apply post-milking teat dip immediately after the last teat is milked, before the cow is released from the stanchion. The teat canal remains open for 15 to 20 minutes after milking, creating a direct pathway for bacteria to enter the udder. Post-milking teat dip closes this window of vulnerability and is the single most important mastitis prevention step in the milking routine.
Step 10: Release the cow and return her to pasture or a pen with access to feed so she remains standing while the teat canals close. Lying down immediately after milking before the teat ends close increases mastitis risk.
Step 11: Strain the milk immediately through a milk filter into a clean, sanitized container. Refrigerate immediately or cool in an ice bath. Fresh milk should reach below 40 degrees F within one hour of collection for optimal shelf life and food safety.

Hand Milking vs. Machine Milking
Hand milking a family cow is a skill most homesteaders can develop within a few weeks and produces perfectly good milk indefinitely with proper technique. The physical demands of hand milking twice daily, particularly for cows with high milk volume or firm, well-attached udders, are significant. Hand fatigue and forearm strain are common complaints from hand milkers in the first several months.
A portable single-unit electric milking machine reduces milking time from 15 to 20 minutes to 5 to 8 minutes per cow and eliminates the physical strain of hand milking entirely. Quality portable milking machines designed for single-family cows cost $300 to $800 and last for many years with proper maintenance. For homesteaders committed to long-term family cow ownership, the investment is usually justified within the first year of use.
Whichever method you use, the pre- and post-milking hygiene steps remain the same. The machine does not change the protocol, only the milking itself.
Recognizing and Responding to Mastitis
Mastitis, infection of the udder, is the most common health problem in dairy cows and the one most directly tied to milking hygiene. The strip cup check before every milking is your primary detection tool: any flakes, strings, clots, or watery discoloration in the stripped milk means stop and evaluate before the session continues.
According to the University of Wisconsin-Madison Extension, proper teat preparation and post-milking teat dipping are the two most evidence-supported prevention practices available at any scale.
For more on choosing the right cow to milk, see our Jersey cow guide. A family cow gives you more milk than a household can drink fresh, so it is worth knowing whether you can freeze milk and how to do it without wrecking the texture. If you have not settled on an animal yet, start with our guide to choosing cow breeds for milk, meat, or both.
Our full guide to mastitis in cows covers detection, treatment, and prevention in depth.Frequently Asked Questions About How to Milk a Cow
How long does it take to milk a cow by hand?
Hand milking a family cow takes 15 to 20 minutes per milking session for a cow with a well-attached udder and good milk flow, plus 5 to 10 minutes for the pre- and post-milking hygiene steps. Total time at the stanchion is typically 20 to 30 minutes twice daily. Machine milking reduces the milking portion to 5 to 8 minutes while the hygiene steps remain the same.
How often should you milk a cow?
Milk twice daily, 10 to 12 hours apart, on a consistent schedule. Once-a-day milking is practiced on some homesteads and is possible, particularly later in lactation when production has declined, but reduces overall milk yield by 20 to 30% compared to twice-daily milking and increases mastitis risk if the cow is producing large quantities.
How do you know if a cow has mastitis?
The strip cup check before each milking is the primary detection method. Abnormal milk including flakes, clots, strings, or watery or off-color discharge indicates possible mastitis. Physical signs in the udder including heat, swelling, hardness, or pain when handled also indicate mastitis. A California Mastitis Test available at farm supply stores confirms subclinical mastitis before visible milk changes occur.
What is a milking stanchion and do you need one?
A milking stanchion is a restraining device that holds the cow’s head securely while she eats during milking. It allows safe, consistent access to the udder without the cow being able to kick forward, step into the pail, or move away from the milker. A stanchion is essential for safe milking, particularly for new cows and new milkers. Attempting to milk a standing, unrestrained cow without a stanchion is unsafe for both the cow and the person.
When does a cow stop producing milk?
A cow’s milk production naturally declines over 10 to 12 months following each calving. When daily production drops to 1 to 2 gallons or less and re-breeding has occurred, most family cow owners dry the cow off, stopping milking to allow the udder to rest before the next calving. The dry period lasts 60 days before the expected calving date and is essential for udder health and the production of colostrum for the next calf.