

Seasonal storage ideas tend to fail in predictable ways. Wet gloves get sealed in a tote. The tree stand ends up nowhere near the tree. Empty canning jars collect dust beside paint thinner. Six months later, we spend an afternoon looking for something we know we own.
A useful storage system does not need matching bins or a large basement. It needs to answer four questions:
- Is this item clean and completely dry?
- Where will we look for it first?
- Can we reach it without unloading half the room?
- What needs repair, replacement, or attention before its next use?
Those questions matter more than the color of the containers.
Start with a landing place for wet and dirty gear
Mud, road salt, snow, and damp fabric should not go straight into long term storage. Set up a small landing place near the door, even if it is only a boot tray, two hooks, and a washable basket.
Give each kind of mess somewhere to go:
- Put wet boots on a tray with enough space around them to dry. Remove liners and insoles when moisture gets trapped inside.
- Hang coats, snow pants, and gloves with air between them. A heap in a basket stays damp much longer.
- Keep a separate basket for washable hats, scarves, and gloves. Wash and dry them before putting them away for the season.
- Brush dried mud from sleds, shovels, and traction cleats outdoors. Wipe off road salt, then dry metal parts before storage.
- Set aside anything with mildew, a strong odor, a leak, or pest damage. Do not put a questionable item into a clean bin and hope for the best.
This landing place is for drying and sorting, not permanent storage. If gear lives there all winter, schedule a quick reset whenever the basket fills or the hooks become crowded.
What You’ll Learn
Store winter gear by person and job
One enormous “WINTER” tote looks efficient until somebody needs one pair of gloves from the bottom. Smaller groups are easier to use.
For everyday clothing, a bin or shelf section for each person works well. Keep coats on sturdy hangers if there is room. Place mittens, hats, scarves, and boot liners together. Label children’s gear with the size as well as the name. At the end of the season, mark items that may be too small next winter instead of making that decision during the first cold snap.
Store equipment by job rather than by shape. Ice scrapers, windshield covers, and emergency blankets belong together because they go back into the vehicle at the same time. Snow shovels, roof rakes, and ice melt belong near the exit because carrying them through the house is a nuisance. Sleds and snow toys can go deeper into storage once the weather changes. If you are planning indoor work for the cold months, keep a separate list of winter homestead projects with the tools and materials they need.
Before packing gear away:
- Wash and dry washable fabric items.
- Empty pockets.
- Fasten hook and loop closures so they do not snag other fabric.
- Loosen boot laces and open closures so the inside can dry.
- Remove batteries from seasonal lights, heated gloves, and similar items if the manufacturer recommends it.
- Write down repairs and missing pieces. A note that says “replace left glove” is more useful than discovering the problem next winter.
Avoid compressing insulated coats and sleeping bags for months unless their care instructions allow it. Compression saves space, but it can be hard on loft. Use vacuum bags for items that tolerate compression, not as a default for every soft thing in the house.
Pack holiday decor for the way you unpack it
Holiday decorations are easier to manage when bins follow the order of use. If you clean before decorating, this holiday deep-cleaning checklist can help you finish the messiest jobs before the boxes come out. Pack the mantel together, the front porch together, and the tree together. If several holidays share the same storage area, give each one its own clearly labeled section.
Make an “OPEN FIRST” container for the items needed at the beginning of setup. It might hold light clips, extension cords, timers, spare bulbs, command hooks, and the tree stand hardware. A small “PUT AWAY LAST” label on that same container helps keep the basic tools available through cleanup.
Protect fragile items from movement and weight

Fragile decorations need enough structure to prevent movement and crushing. Tissue paper alone will not do that.
Use a divided ornament box, the original fitted packaging, or a shallow rigid bin with homemade cardboard dividers. Wrap each delicate piece, fill empty spaces so items cannot shift, and keep heavy pieces below light ones. Do not pack glass ornaments in a deep tote beneath wreath hangers, ceramic houses, or extension cords.

A few habits prevent a lot of damage:
- Remove batteries before storage unless the maker says otherwise.
- Coil light strings loosely instead of folding them into a tight knot. A piece of corrugated cardboard makes a simple reel.
- Label items with tiny detachable parts, then bag the parts with the item.
- Store wreaths upright in a rigid container or hang them from a protected hook. Do not crush them beneath soft goods.
- Keep candles in a temperature stable indoor spot. An attic or hot shed can leave them bent or melted.
- Take one photo of a complicated display before dismantling it. Save the photo in a clearly named phone album or print it and place it in the bin.
Use tissue or other clean wrapping that will not transfer ink or color to pale or porous decorations. Old newspaper is cheap, but it is a poor choice for anything that may stain.
Treat canning equipment as food equipment

Canning tools deserve a clean, dry area away from paint, fuel, pesticides, pet supplies, and strong household chemicals. A pressure canner is large, but that does not make it a good catchall for dirty utensils or unrelated hardware.
At the end of the season, wash the canner and removable parts according to the manufacturer’s directions, then dry everything thoroughly. Clean the vent and safety valve, inspect the gasket, and never immerse a dial gauge in water. The National Center for Home Food Preservation’s equipment storage guidance recommends placing clean paper towels in the canner to absorb moisture and odors, then resting the lid upside down so the pot does not seal and trap moisture. Penn State Extension’s pressure canner checklist also recommends checking the vent tube, gasket, handles, rack, gauge, and other parts before the next canning season.
Keep the model number and instruction manual with the canner. A zippered bag or document sleeve on the nearby shelf works better than taping paper to a vessel that must be washed. Store small model specific parts, such as the correct weight, in a labeled lidded container beside the canner. Do not assume weights or replacement parts from another model are interchangeable.
Sort jars, bands, and lids before they go on the shelf
Wash empty jars and let them dry fully. Check rims for chips and bodies for cracks. Remove damaged jars from the canning supply. Do not repurpose cracked glass, which can break during ordinary handling. Ask your local waste or recycling program how to dispose of it. Most important, do not leave a questionable jar mixed with sound canning jars.
Store good jars upright in a divided box or shallow bin that supports them and limits clinking. Avoid precarious towers. If shelves are open, a clean cover or lidded container will keep out dust and pests, but the jars still need to be dry before the lid goes on.

Remove screw bands from empty jars. Wash and dry the bands, discard any that are rusted, bent, or dented, and store the sound ones in a dry bin. Used flat metal lids should not return to the canning supply. The National Center’s jar and lid guidance says Mason jars can be reused with careful handling, screw bands can be reused while they remain in good condition, and standard flat lids require a new lid for each canning use.
Keep new lids in their original box so the instructions and lot information stay with them. Mark open boxes before buying more. Specialty reusable lids should stay with their own instructions and components.
Store jar lifters, funnels, bubble removers, magnetic lid tools, and clean cloths together in a covered food equipment bin. If an item touches a jar rim, lid, or food, do not let it share an uncovered tote with garage tools or garden chemicals.
If you are still building confidence with the equipment, review our guide to water bath canning for beginners before the next round of produce is ready. Finally, put a calendar reminder several weeks before canning season. Dial gauge pressure canners need an accuracy check before use each year, and scheduling early leaves time to replace a faulty gauge or worn part.
Labels should tell you what to do next
A label that says “HOLIDAY” is not much help. A useful label includes enough detail to make the next decision without opening the bin.
Try this format:
CHRISTMAS: tree ornaments and topper
Room: Living room
Packed: 2026
Next step: Replace two warm white light strings
Put the label on the side that faces the aisle and, if bins get stacked, on the lid too. Use large plain text. Color can help distinguish categories, but do not make color the only clue.
For opaque containers, add a short contents list. For clear containers, label them anyway. Clear plastic turns cloudy, bins rotate on the shelf, and small pieces are still hard to identify.
Prints TZe Label Tapes up to ~1/2 inch White

A simple shelf map helps when storage is spread around the home:
- Entry closet: daily winter gear
- Bedroom underbed bin: clean holiday linens
- Hall closet top shelf: lightweight decor
- Kitchen shelf: canning tools and new lids
- Basement rack: empty jars and canner
Keep the map inside a cabinet door or in a shared phone note. A detailed inventory app is optional. If nobody will update it, a five line map is the better system.
Keep moisture and pests from settling in
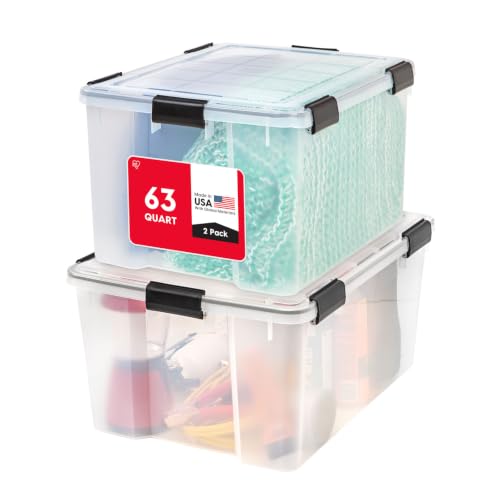
A sealed tote is not a cure for damp storage. It can trap moisture just as effectively as it blocks dust. Clean and dry every item before packing it, and choose the driest available part of the space.
In a basement or garage:
- Keep containers off bare concrete and away from walls that sweat or leak.
- Use shelving that can carry the load. Canners, jars, and ceramic villages get heavy quickly.
- Put the heaviest bins between knee and shoulder height when possible. Store light wreaths and textiles higher.
- Leave enough clearance to inspect behind and beneath the shelves.
- Check the area after a hard rain, a plumbing problem, or a sharp change in weather.
- Use a hygrometer if dampness is a recurring concern. A desiccant packet can handle a little enclosed moisture, but it will not fix a wet room or an active leak.

Pest control starts with removing what attracts pests. Do not pack food, crumbs, pet treats, birdseed, waxy residue, or dirty natural fiber textiles with seasonal supplies. Use lidded plastic bins for fabric and paper goods in a pest prone area. Inspect cardboard boxes for chewing, droppings, webbing, or insects before carrying them into the living space.
If pests are active, deal with the source and entry points rather than dropping repellents into bins at random. Follow the product label for any trap, bait, pesticide, or moth control product. Keep those products away from canning equipment and other food contact items.
Make a small space earn its keep
In a small home, every awkward bin creates work. A few well-chosen rustic storage bins and baskets can keep everyday items accessible without making the room feel like a warehouse.
Use the best location for the right weight and frequency:
- Under a bed: clean, dry, low profile items such as linens, fabric garlands, gift bags, or flat decor
- Top closet shelf: lightweight, rarely used pieces
- Back of a door: empty wreath bag, light tote, or organizer for hats and gloves
- Deep cabinet: pressure canner with its lid inverted
- Narrow shelf: jar boxes placed in a single reachable row
- Suitcase: soft holiday linens or stockings, but only if you will remember to empty it before a trip
Do not build storage around perfect stacking if the bottom bin comes out every week. Put frequently used items in front and seasonal items behind. When possible, leave enough room above a bin to grip and slide it out without dismantling the entire stack.
Some things should leave the storage area. Duplicate cookie tins, broken light strings, mystery cords, chipped canning jars, and outgrown gloves do not become more useful because they have a labeled container. Repair, donate, recycle, or discard them as appropriate before paying for another tote.
A 20 minute seasonal reset
A short reset keeps the system from collapsing between major changeovers.
- Empty the wet gear basket and clean the boot tray.
- Return stray items to the right bin.
- Pull damaged or damp items into a clearly marked repair or quarantine box.
- Check the floor and lower shelves for moisture or pest signs.
- Update one or two labels while the contents are fresh in your mind.
- Move the next season’s first use bin somewhere reachable.
Stop after 20 minutes if that is the time available. A modest system that gets maintained beats a perfect one that takes an entire weekend to restore.
Frequently Asked Questions About Seasonal Storage
Are plastic totes always better than cardboard boxes?
No. Plastic is useful where dust, splashes, or pests are a concern, but it can trap moisture. Cardboard breathes and is easy to label, but it weakens when damp and offers little pest protection. Use clean, dry containers that fit the risk of the room and the item inside.
Can winter gear go into storage as soon as it feels dry?
Check thick seams, cuffs, liners, and the inside of boots. The surface may feel dry while hidden layers are still damp. Give bulky gear more air and time before sealing it in a container.
Should empty canning jars be stored with the bands screwed on?
No. Store clean, dry jars and bands separately. Bands left on jars can hold moisture and rust, and the National Center for Home Food Preservation recommends removing, washing, drying, and storing bands in a dry area.
What belongs in an “OPEN FIRST” holiday bin?
Put setup tools and universal supplies there: hooks, clips, timers, extension cords, spare bulbs, batteries kept in their retail packaging, and the hardware for the main display. Keep fragile decorations in their own protected container.
How often should seasonal storage be checked?
Check during each seasonal changeover and after any leak, flood, pest sighting, or long power outage that affects humidity control. A quick look at the floor, walls, labels, and lower bins is usually enough to catch trouble early.