
Winterizing bee hives is less about sealing bees away from the cold and more about helping a healthy colony manage food, moisture, wind, and pests until spring returns. Honey bees create their own heat by clustering and vibrating their flight muscles. Our job is to make sure the cluster has enough stored food to reach, a dry space overhead, and a hive that can stand up to the weather without becoming airtight.
The right setup depends on where you keep bees. A colony facing months of deep freezes needs different protection than one in a place with short cold snaps and frequent warm spells. Local beekeepers and your county extension office can help you fine-tune the details, but the order of operations stays the same: control mites, confirm adequate stores, reduce drafts, manage moisture, and choose emergency feed before cold weather closes the hive.
What Winterizing Bee Hives Actually Means
Winter preparation begins while the weather is still warm enough to open the colony. You are trying to send a strong population of healthy winter bees into the cold season with a functioning queen, low mite pressure, enough honey, and equipment that sheds rain and blocks harsh wind.
Cold alone is not usually what kills a healthy colony. Starvation, mites and the viruses they carry, excess moisture, queen failure, and a cluster that is too small are more common problems. That is why a roll of hive wrap cannot rescue a struggling colony. The biological work comes first, while insulation and wrapping help the bees conserve what they already have.
What You’ll Learn
- Finish mite control and store checks before cold weather makes full inspections risky.
- Feed heavy syrup early enough for bees to store and cap it, then switch to fondant or dry sugar when temperatures stay cold.
- Keep rain and wind out while preserving an upper path for moist air to escape.
Start With Colony Health, Not Hive Wrap
Before adding insulation, assess whether the colony is ready to overwinter. A healthy hive should have a laying queen, a solid population, and brood that looks normal for the season. The brood nest naturally contracts in fall, so fewer eggs are not automatically a warning sign. Spotty brood, a missing queen, very few adult bees, or obvious disease deserves attention before temperatures fall.
Varroa control also needs to happen before winter bees are raised. Mites feed on developing and adult bees and spread viruses, leaving the long-lived winter generation weakened before it ever forms a cluster. Use a measured mite count instead of guessing, and follow treatment labels for temperature limits and honey-super restrictions. Our varroa mite treatment guide explains how to test and choose a treatment for the season.
Late fall is also the time to combine a colony that is too small to survive, replace damaged equipment, and reduce empty space. These decisions are local and sometimes difficult, which is one reason an experienced bee club mentor is so valuable during your first winter.
How Much Honey Does a Hive Need for Winter?
There is no single number that fits every climate or hive configuration. In relatively moderate regions, extension recommendations often begin around 40 to 60 pounds of stored honey. In colder northern climates, a full-sized colony may need 80 to 100 pounds or more. Long winters, large colonies, and late spring nectar flows all increase the amount a hive can consume.
Ask a local beekeeper what a properly provisioned brood box should weigh in your area. Then learn to heft the hive by lifting gently from the back or one side. The goal is not a perfect measurement. It is a repeatable comparison that lets you notice when a hive is becoming much lighter.
During the last full inspection, look at where the stores are located as well as how much is present. The cluster usually moves upward through winter. Honey above and beside the brood area is more useful than food stranded in a box the cluster cannot reach during a cold spell. Leave the colony enough honey before taking a fall harvest. If you are still deciding what can safely come off the hive, review our guide to when to harvest honey.
Winter Feeding: Syrup First, Solid Feed Later
If a colony is light while daytime temperatures are still warm, feed a heavy fall syrup made with two parts white granulated sugar to one part water by weight or volume. The lower water content takes less work for bees to cure than spring syrup. Use an internal or top feeder that limits robbing, and avoid spilling syrup around the apiary.
Start early enough for the bees to move, dry, and cap the syrup. Once temperatures regularly fall below about 50 degrees F, liquid feed becomes less useful. Bees may stop taking cold syrup, and added liquid can increase moisture inside the hive. Remove entrance feeders before freezing weather, since they chill quickly and can invite robbers.
For cold-weather insurance, place solid feed directly above the cluster where rising warmth makes it accessible. Common choices include:
- Commercial bee fondant
- A sugar brick or candy board
- Dry granulated sugar placed with the mountain camp method
Each method works when the feed stays dry and the cluster can reach it. Fondant is compact and easy to check. Sugar bricks are simple to prepare ahead of time. Dry sugar can also absorb some condensation, but it needs enough space under the cover and must not block ventilation.
Check your feeder setup against your hive style before buying extra equipment. Our beekeeping equipment guide covers feeders and the basic tools that earn their place in a small apiary.
Do not feed brown sugar, molasses, or syrup made from questionable leftovers. Plain refined white sugar is the safe standard for supplemental feeding. Honey from another beekeeper can spread American foulbrood spores, so only feed honey that came from your own healthy colonies.
Ventilation Matters Because Winter Bees Make Moisture
A clustered colony gives off heat and water vapor as it consumes honey. Warm, damp air rises. When it hits a cold inner cover, moisture can condense and drip back onto the bees. A colony can tolerate cold air far better than cold water falling into the cluster.
The answer is controlled ventilation, not a wide-open hive. Keep the lower entrance from becoming blocked by dead bees or snow, and provide a small upper exit for humid air. Depending on your equipment, that may be a notched inner cover, an upper entrance, a shim with a ventilation hole, or a quilt box designed for your hive.
Top insulation helps by keeping the ceiling closer to the colony’s temperature, which reduces condensation directly over the cluster. A piece of rigid foam above the inner cover or an insulated cover can be effective when it is protected from chewing bees and weather. In damp climates, a moisture quilt filled with wood shavings is another option, but it still needs a clear route for vapor to leave.
Tilt the hive slightly forward so any water that does collect can drain toward the entrance. Make sure the lid is sound, boxes fit together, and rain cannot run through a crack. The goal is a dry hive with gentle air exchange, not a chimney that strips heat from the bees.
The University of Florida’s guide to overwintering honey bee colonies offers a helpful comparison of insulation, ventilation, wrapping, and feeding practices for northern climates.
Should You Wrap a Beehive for Winter?
Wrapping can help in places with prolonged freezing temperatures, sharp temperature swings, or strong winter wind. It reduces heat loss through the wooden walls and blocks air from pushing through small gaps. In mild climates, a sound lid, a windbreak, and top insulation may be enough.
Your regional norm matters more than a universal rule. Ask nearby successful beekeepers whether they wrap, what material they use, and when they remove it. A setup that works in Minnesota may hold too much heat and moisture during an Oklahoma warm spell.
If you do wrap, use black roofing felt, a commercial hive sleeve, or rigid insulation designed so it will stay dry. Secure it against wind, keep the entrance open, and do not cover ventilation holes. Dark material absorbs sunlight and can help the hive warm on clear winter days, but bees may fly when the air is still too cold for a safe return. Keep the landing area clear so you can watch activity and remove dead bees.
A windbreak can be just as useful as wall insulation. Position it on the side of the prevailing winter wind while leaving the entrance open to sun and airflow. Fencing, stacked straw bales placed at a safe distance, or a natural hedge can reduce exposure without enclosing the apiary.
Finish the Physical Winter Setup
Once food, health, and moisture are addressed, walk through the remaining hardware:
- Install an entrance reducer so the smaller winter population can defend the hive.
- Add a mouse guard before rodents begin looking for shelter, making sure bees can still pass through.
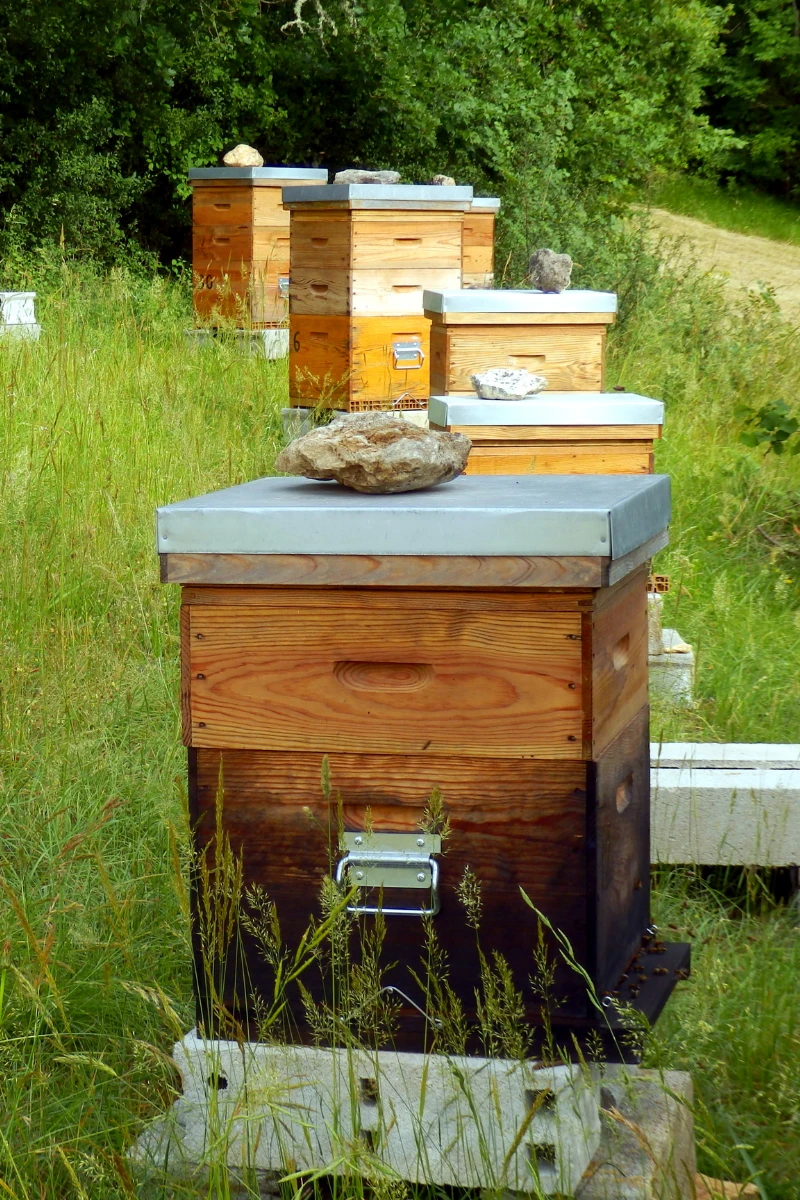
- Verify that the hive stand is level from side to side and tipped slightly forward.
- Strap or weight the outer cover so winter wind cannot lift it.
- Remove empty supers and close large gaps between boxes.
- Clear tall grass and debris that hold moisture around the stand.
Do not close the entrance completely. Bees need airflow and a path for cleansing flights on warm days. They also need a way to carry dead bees out of the colony.
This is the same steady observation that supports a colony during the rest of the year. Our guide to maintaining a healthy beehive covers the inspection habits that make fall decisions easier.
How to Check Bees During Winter
Winter monitoring happens mostly from outside the hive. After storms, confirm that snow, ice, and dead bees are not blocking the lower entrance. Look for signs that the lid or wrap has shifted. On a mild day, watch for a few bees making cleansing flights and clearing debris.
Heft the hive every few weeks using the same lifting motion. A rapid change in weight is a reason to add solid feed. If the hive has a removable tray, debris below the cluster can also show where the bees are located and whether they are moving through stores.
Avoid pulling frames or breaking the propolis seal during cold weather. If you must open the top to add emergency feed, choose a calm, sunny day and work quickly. Extension recommendations vary, but many advise waiting until temperatures are at least 50 to 55 degrees F for a full inspection. Feeding from the top can often be done more briefly because you do not need to disturb the brood boxes.
Do not assume a lack of entrance activity means the colony is dead. A healthy cluster may stay inside for days or weeks during severe cold. You can listen with an ear against the box or use a stethoscope, but avoid pounding on the hive to provoke a response.
A Simple Fall Timeline for Winterizing Bee Hives
Begin in late summer by testing and treating for varroa, evaluating the queen, and noting food reserves. Early fall is the main feeding window for a light colony. As nights cool, reduce the entrance, install a mouse guard, repair equipment, and arrange the stores around the brood nest.
Add top insulation, ventilation, and any regional wrap before sustained freezing weather arrives. Place emergency fondant or a sugar brick above the cluster if stores are marginal. Through winter, keep the entrance open, monitor weight, and replenish solid feed when needed.
Good winter preparation does not require the hive to be complicated. It requires each problem to be handled at the right time. Healthy bees, low mite numbers, enough reachable food, and a dry box give the colony its best chance to greet the first warm days of spring.
Frequently Asked Questions About Winterizing Bee Hives
When should I start winterizing bee hives?
Start in late summer with mite testing, queen assessment, and a check of honey stores. Complete feeding and major hive work in early fall while daytime temperatures are still warm enough for bees to take syrup and repair the nest. Add mouse guards, insulation, and wraps before sustained freezing weather.
At what temperature should I stop feeding sugar syrup?
Stop relying on liquid syrup when daytime temperatures regularly stay below about 50 degrees F. Bees take cold syrup poorly, and the added liquid can increase hive moisture. Use fondant, sugar bricks, or dry granulated sugar above the cluster for cold-weather emergency feed.
Does every beehive need to be wrapped for winter?
No. Wrapping is most useful where winters are long, very cold, or windy. In milder climates, top insulation, a dry lid, a windbreak, and controlled ventilation may be enough. Follow successful practices in your region and never block entrances or ventilation holes with a wrap.
How can I tell if my bees have enough food without opening the hive?
Heft the hive by lifting gently from the back or one side and repeat the same motion throughout winter. A hive that becomes noticeably lighter may need solid feed. You can also watch the debris pattern on a bottom tray to estimate where the cluster is moving.
Can bees freeze to death in a hive?
A strong colony can survive very cold weather by forming a cluster and generating heat. Colonies are more likely to fail because they are too small, weakened by mites, wet from condensation, or unable to reach food. Wind protection and insulation reduce stress, but colony health and accessible stores remain the priorities.
Winter always asks a little patience from a beekeeper. Prepare the colony before the cold settles in, then resist the urge to keep opening the boxes. If this guide helped you plan your fall checklist, sign up for the Waddle & Cluck newsletter for more seasonal homestead notes.