
Rendering beeswax is the process of melting raw wax from your hive, straining out the debris, and cooling it into clean blocks you can actually use. Every colony produces wax as a byproduct of the honey harvest, and most of it gets thrown away when it could become candles, salves, or food wraps instead. That other sticky hive byproduct, propolis, is worth saving too. The good news is that you do not need special gear to begin. With a gentle heat source, some water, and a piece of cheesecloth, you can turn a pile of sticky cappings into golden, usable wax in an afternoon.
What You’ll Learn
Where Does Beeswax Come From?
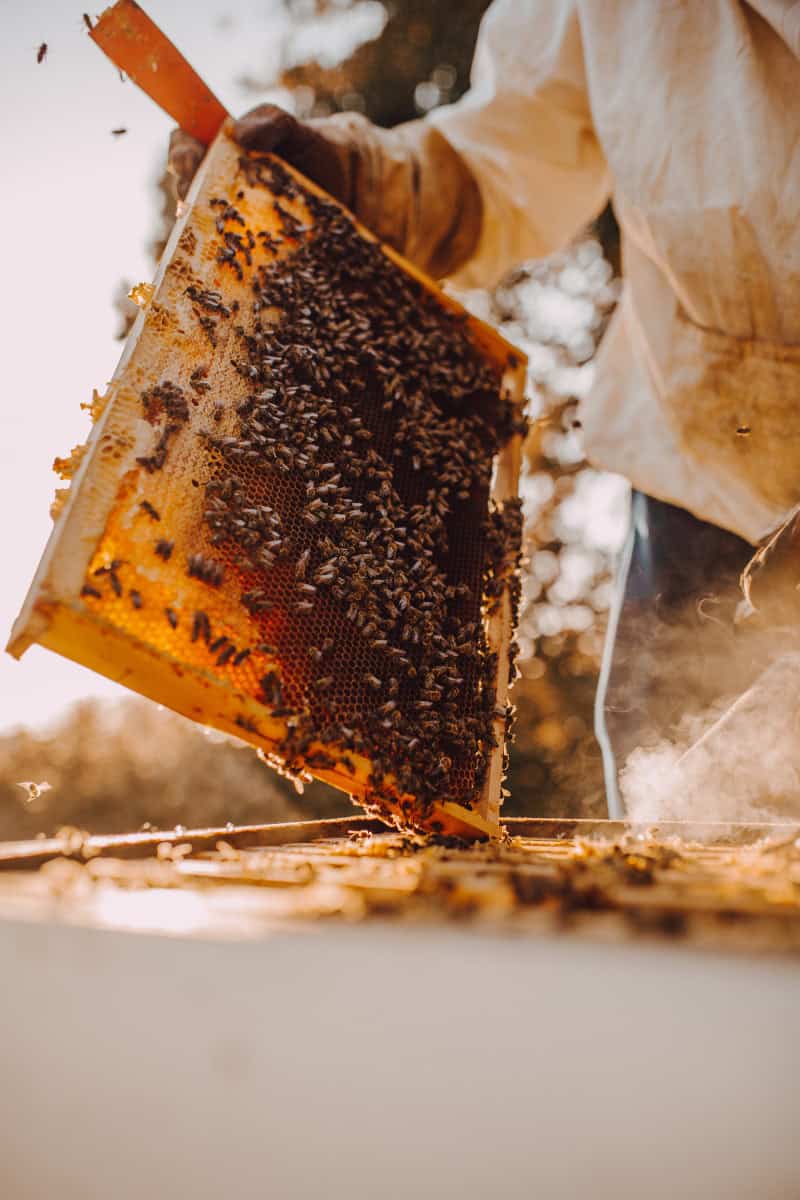
Your wax comes from two places, and they behave a little differently once you start melting them. The first is cappings: the thin, pale seal of wax that worker bees lay over each cell of finished honey. When you uncap frames during extraction, you slice these off, and they are the cleanest wax you will ever handle.
The second source is old comb, the darker wax you pull when you rotate out frames during routine care. If you want a refresher on when frames come due for replacement, our guide to maintaining a healthy beehive walks through the rotation schedule.
Cappings render into light, buttery yellow wax with very little effort. Old brood comb is a different animal. It has held generations of cocoons, pollen, and propolis, so it renders darker, yields less usable wax per pound, and needs more filtering. Both are worth saving. Just keep them in separate bags so you can render your premium cappings on their own when you want the palest possible blocks.

Why Bother Rendering Beeswax?
Rendering beeswax turns a waste product into one of the most versatile materials on the homestead. Raw cappings and comb are sticky, full of honey residue, and prone to attracting pests like wax moths if you leave them sitting around. Melting and cleaning the wax stabilizes it into a shelf-stable block that stores for years without spoiling. Beeswax is a genuine hive product with real value, and the Extension Foundation’s Bee Health resources treat it as a harvest worth managing rather than a scrap to discard.
There is a practical economics angle too. Clean, filtered beeswax sells well at farmers markets and craft fairs, and a single strong hive can throw off a surprising amount over a season. If you are already tracking your honey yield, folding wax into the same harvest routine costs you almost nothing extra. Our overview of when to harvest honey explains how the two products come off the hive together during the same window.
The Double-Boiler and Crockpot Method
For small batches of clean cappings, a double boiler is the simplest way in. Set a heat-safe container of wax inside a larger pot of simmering water, and let the water do the heating so the wax never touches a burner directly. Beeswax melts around 145 to 150 degrees F, so you do not need much heat at all. Keep the temperature well under 185 degrees F, because pushing past that scorches the wax, darkens it, and destroys the clean color you are working for.
A slow cooker or crockpot works on the same principle and is even more forgiving. Set it to low, add your wax, and check it every 20 to 30 minutes rather than walking away. Dedicate the equipment to wax once you use it, since beeswax is nearly impossible to fully scrub out of a pot you also cook in. Line the crockpot with a disposable liner or reserve a thrift-store unit just for rendering.
Should You Add Water to the Pot?
Adding an inch or two of water directly to the melting wax gives you cleaner results and a built-in safety buffer. The water keeps the pot temperature capped near boiling, so the wax cannot overheat, and it gives debris somewhere to settle. As the mixture cools, the wax rises to the top and the water carries the dirt away below it. This overlaps with the hot-water method described next, and it is the approach we reach for most often with mixed or dirty comb.
The Hot-Water Method: Why Wax Floats and Debris Sinks
The hot-water method leans on a simple fact of physics: melted beeswax is lighter than water, so it floats, while the heavier dirt, cocoon husks, and dead bees sink or suspend in the water below. Fill a pot with several inches of water, add your wax, and heat gently until everything melts into a single dark layer on top. Then turn off the heat and let the whole pot cool slowly, ideally overnight.
By morning you will have a solid disc of wax floating on the water. Lift it out and you will find a layer of gunk stuck to the underside, which you scrape off with a knife or spoon. This method handles old comb better than any other because the water pulls so much debris out in a single step. The tradeoff is that you are working with a heavy pot of near-boiling water, so move slowly and keep the setup on a stable surface.
Using a Solar Wax Melter for Larger Batches
Once you are processing wax from several hives, a solar wax melter earns its keep. It is an insulated box with a glass or clear plastic lid that traps sunlight, heating the interior enough to melt wax passively while you do other chores. You load raw comb into a tray at the top, and the melted wax runs down through a screen into a collection container below, leaving the heavy debris behind on the screen. On a sunny day, the box interior climbs well past wax’s melting point without any fuel or electricity.
Solar melters do the first, roughest pass for you and cost nothing to run, which is why serious beekeepers build or buy them. The catch is that they only work in warm, sunny weather, and the wax they produce still needs at least one filtered pass to reach candle quality. Think of the melter as a labor-saving first stage rather than a finish. If you are weighing which tools deserve space in your operation, our rundown of beekeeping equipment covers where a melter fits alongside your extractor and other gear.
Filtering for Clean Wax
Clean wax is made in the filtering, not the melting. Once your wax is liquid, pour it through a filter into a mold while it is still hot and pourable. Cheesecloth folded into two or three layers is the classic choice, and a fine paint strainer bag from the hardware store works even better because it catches finer particles and is reusable. Secure the filter over your mold with a rubber band or clip so it does not collapse into the wax.
Plan on multiple passes for genuinely clean results. The first strain pulls out the big material, but a second or even third pass through fresh cloth is what gives you the smooth, particle-free wax that candles and cosmetics demand:
- First pass: removes bee parts, large comb fragments, and most visible debris.
- Second pass: catches the fine sediment that clouds a finished block.
- Third pass: reserved for cosmetic-grade wax destined for salves or lip balm.
Work fast, because beeswax starts to set the moment it drops below about 145 degrees F. Warming your mold and filter slightly beforehand buys you a few extra seconds of flow.

Staying Safe Around Hot Wax
Beeswax is flammable, and that single fact should shape everything about how you render it. Never melt wax over direct high heat or an open flame, because if it gets hot enough it can catch fire, and a wax fire behaves like a grease fire. Always use a water bath or a thermostatically controlled cooker so the wax cannot run away from you. Keep a lid nearby to smother a flare-up, and never pour water on burning wax.
The water in your process carries its own hazard. Hot water and steam cause serious burns, and a pot of wax and water is heavy and easy to slosh. Wear closed shoes, keep children and pets out of the workspace, and never leave melting wax unattended even in a crockpot. Ventilate the room, since old comb can give off smoke and odor as residue burns off. Treat the whole job with the same respect you would give a deep fryer.
What to Do With Your Finished Wax
Clean beeswax is the payoff, and the list of uses is long. Candles are the obvious first project, since beeswax burns slowly with a warm, natural glow and no additives. From there you can move into salves and balms, where beeswax gives the mixture body and a protective barrier for the skin. Reusable food wraps, made by ironing wax into cotton fabric, replace plastic wrap in the kitchen and last for months.
Beeswax also makes an excellent furniture and leather polish when melted with a little oil, and woodworkers use it to lubricate screws and finish raw wood. If you keep bees for the honey first and foremost, it helps to understand how the two products form together, and our explainer on how do bees make honey traces the same wax glands that build the comb you are now rendering.
Start with your cleanest cappings and the simplest method your batch size allows: a double boiler or crockpot for a few frames, the hot-water method for dirty comb, and a solar melter once the volume outgrows your stovetop. Filter until the wax runs clear, keep every heating step under 185 degrees F, and you will end up with blocks good enough for anything you want to make. A few ounces at a time is all it takes for a herbal salve or a batch of after sun lotion bars, which is where most of ours ends up.
Frequently Asked Questions About How to Render and Clean Beeswax
What temperature should you melt beeswax at?
Beeswax melts around 145 to 150 degrees F, so a gentle heat is all you need. Keep it under about 185 degrees F at all times, because higher heat scorches the wax, darkens the color, and creates a fire risk. A water bath or a low crockpot setting holds the wax in the safe range without any guesswork.
How do you clean beeswax without special equipment?
The hot-water method needs only a pot, water, and a heat source. Melt your wax in several inches of water, let it cool overnight, and lift off the solid disc that floats to the top. Scrape the debris from the underside, then remelt and strain through cheesecloth for a cleaner block.
Why is my rendered beeswax dark or dirty?
Dark wax usually comes from old brood comb, which has held cocoons and propolis for many bee generations and simply renders darker than fresh cappings. Dirty or cloudy wax means it needs more filtering. Run it through two or three passes of fresh cheesecloth or a paint strainer, and render cappings separately when you want the palest results.
Can you render beeswax in the oven or microwave?
It is not recommended, because both make it hard to control temperature and both raise the fire risk with a flammable material. A double boiler, a crockpot on low, or a solar wax melter all give you steady, safe heat. Those controlled methods protect the wax color and keep the process from getting away from you.